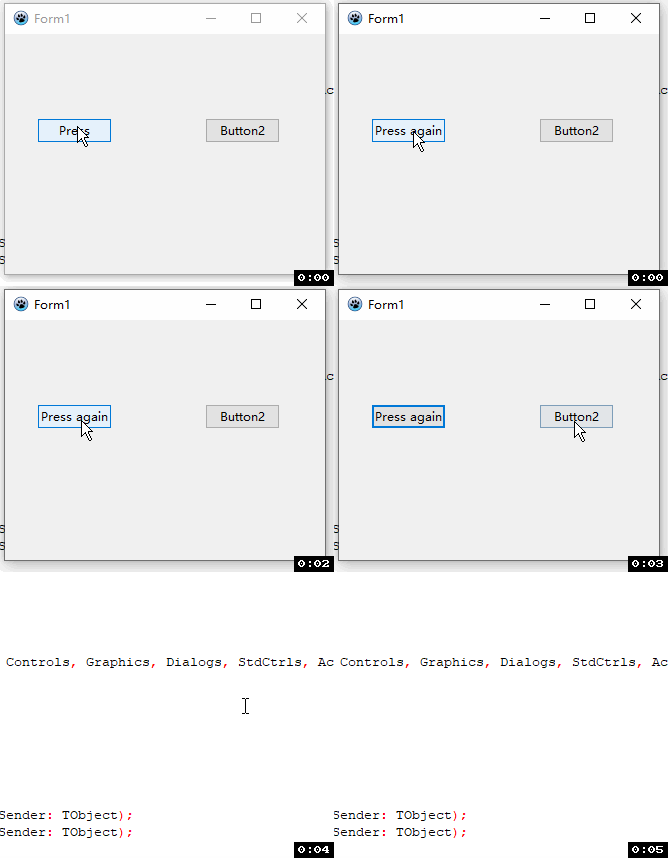
In this section, we will add events to buttons. When you click a button, the code can perform various operations. Here we demonstrate two functions: clicking one button to change its text, clicking another button to close the form window.
Create a New GUI Project
Click the top main menu: Project → New Project → Application (you can also create via File → New → Project → Application) to generate a brand-new GUI graphical program.
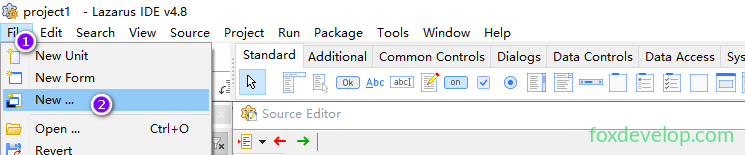
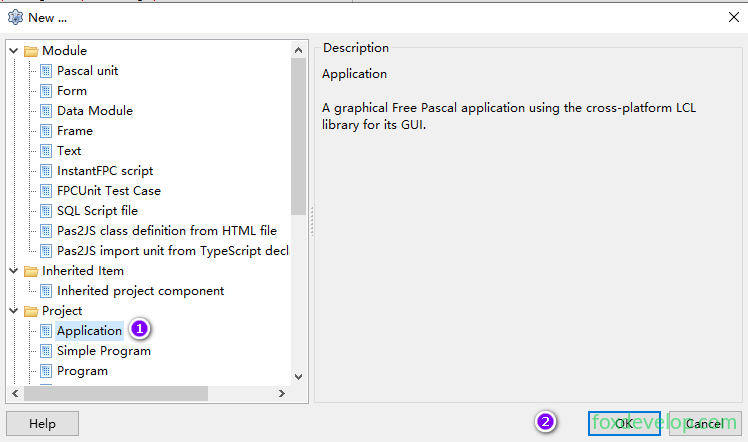
Or

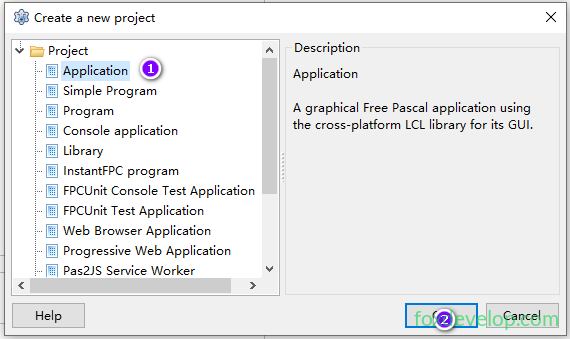
After creation, multiple windows pop up: the top main menu bar, the left Object Inspector, and the Source Editor occupying most of the interface.
Add Two Buttons to the Form
Beneath the top menu bar lies the control category tab bar
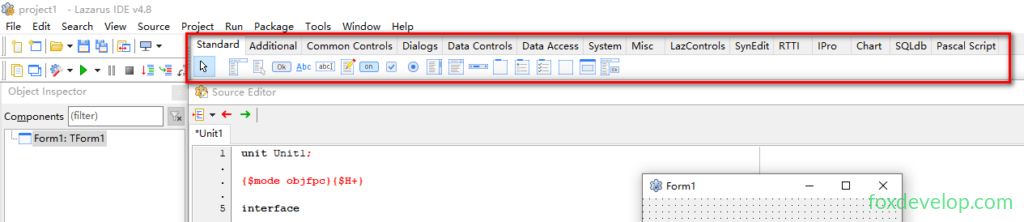
The red box above is the control category tab bar, split into separate tabs. The first tab is Standard, the second is Additional…
If the “Standard” tab is not selected, click to select it;
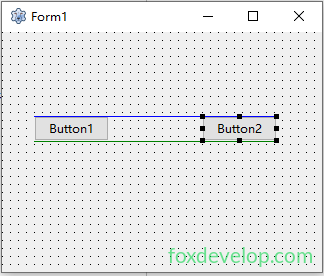
Locate the button icon (rectangle printed with OK) and click it, then click the left area of the Form1 form. A button named Button1 will appear on the form;
Click the button icon on the Standard tab again, then click the right area of the form to create the second button Button2.
Refer to the video of the previous lesson if you are unfamiliar with the operations.
Follow the steps above to add two buttons.
Set Button1 Text and Write Click Event
Single-click to select Button1. The Object Inspector on the left will display all its properties:
If this settings panel is hidden, click the arrow button on the control bar to show it (or press F12 to switch between form and code view).
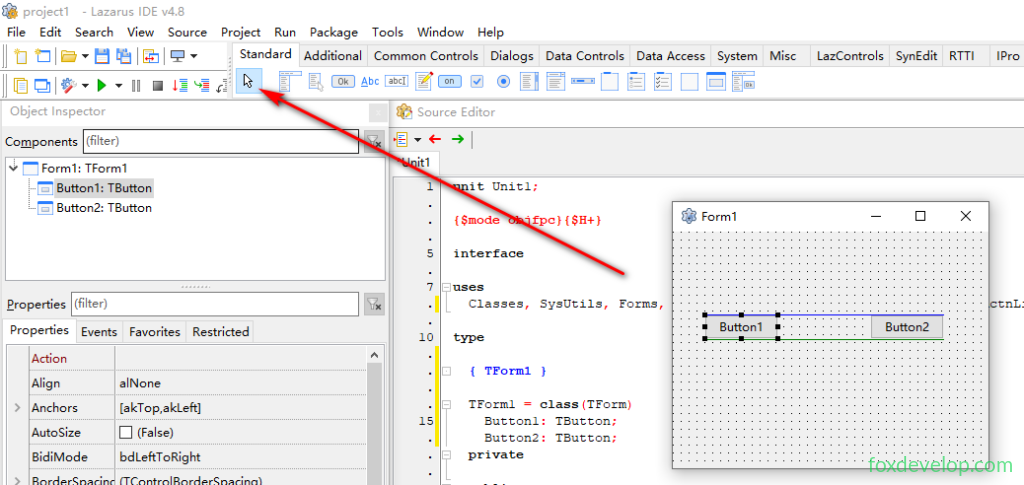
After selecting the first button, the top of the left panel shows the currently selected control is Button1, and the bottom of the panel has two tabs: Properties and Events.
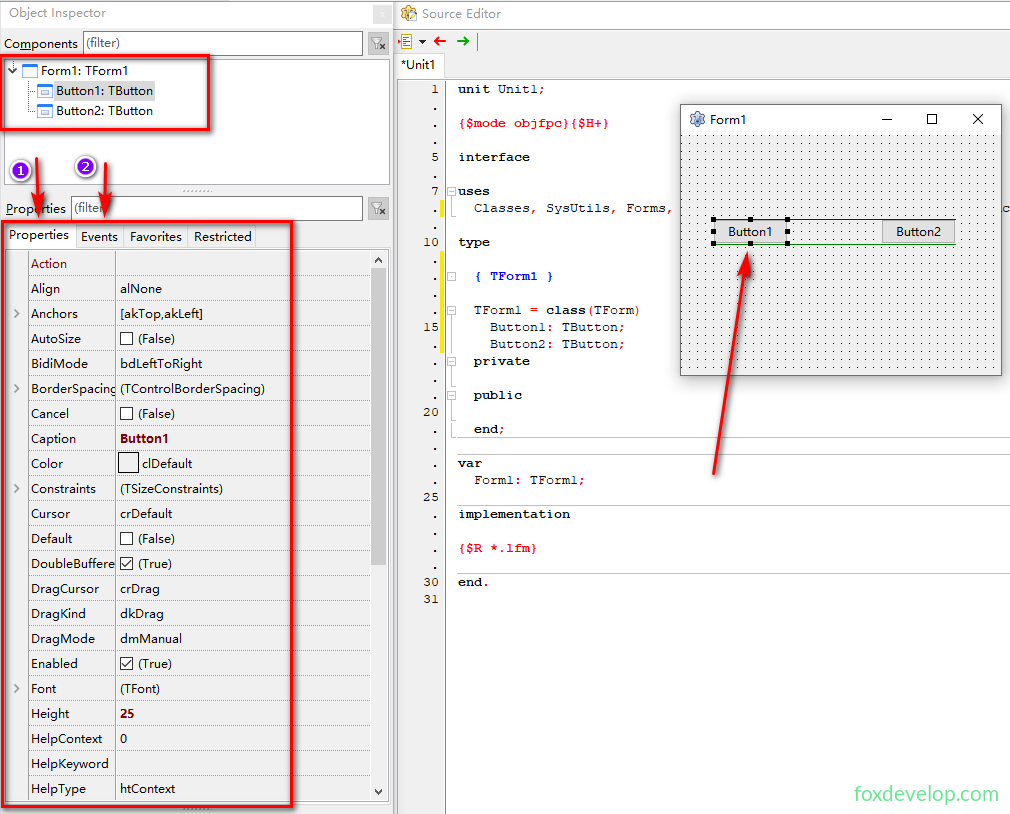
The Properties tab configures the button’s appearance, style, size and other visual styles.
The Events tab binds interactive actions for the button such as click, mouse hover, mouse leave, etc.
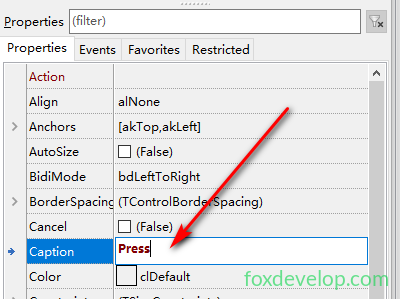
- Find the top
Captionproperty, change the default valueButton1toPress. Press Enter or click blank space, and the button text updates simultaneously; - Switch to the “Events” tab of the Object Inspector, which stores all triggerable events of the button (OnClick, OnMouseEnter, OnMouseLeave, etc.);
- Locate
OnClick(click event), click the three-dot...button on its right. The editor automatically jumps to the code page and generates an empty click function:
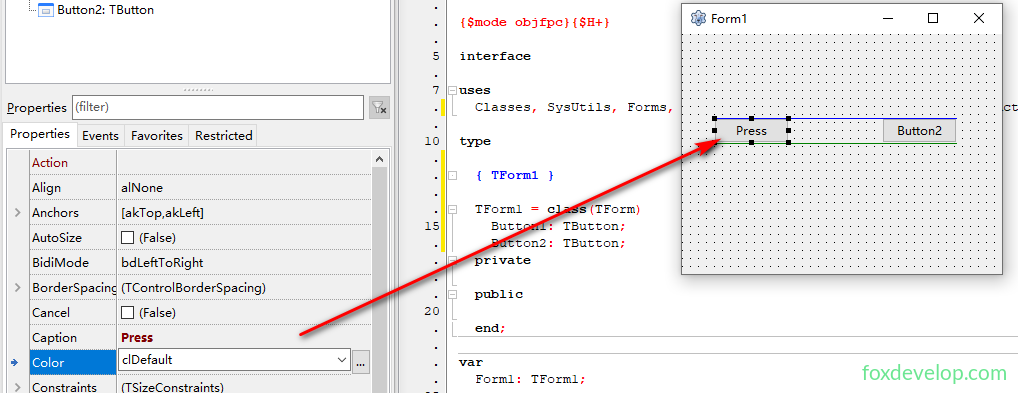
Click blank space to confirm the modification, and the text on the form button changes accordingly.
Keep the button selected and switch to the Events tab.
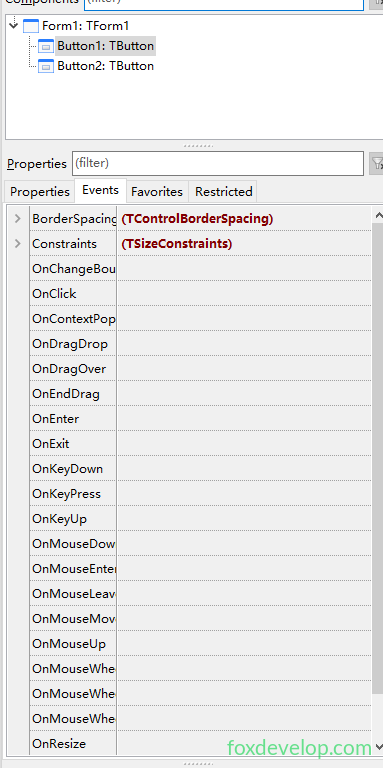
This tab lists all built-in events of the button, and you can bind different actions to the button. Take OnClick as an example: when the user left-clicks the button, the bound event method will execute.
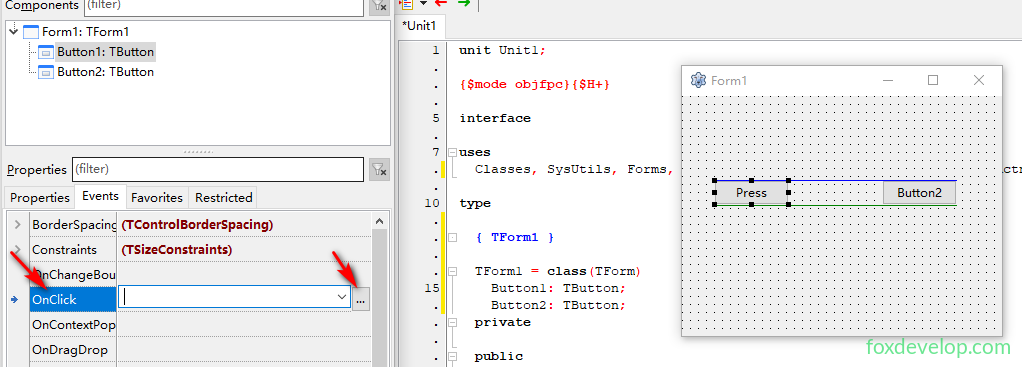
Select the OnClick row and click the ... button on the right to create an empty event function.
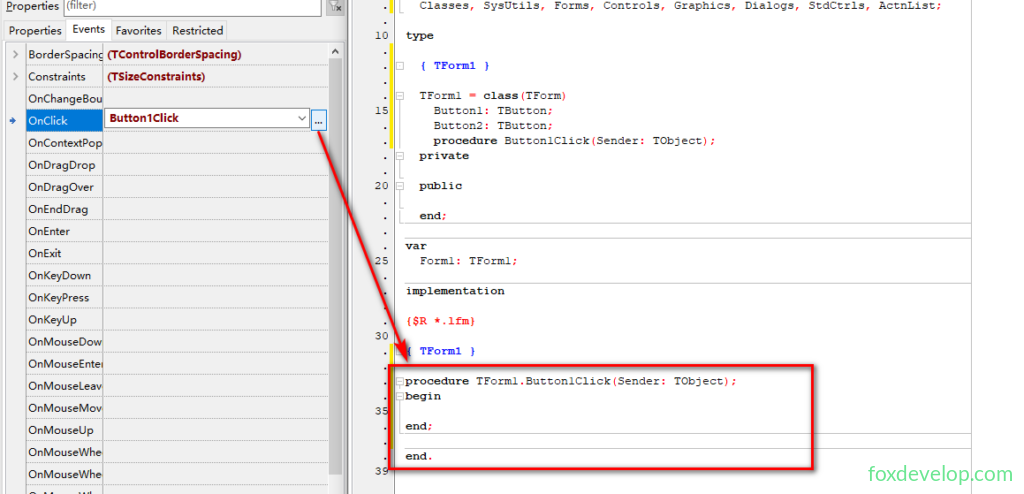
Add one line of code between begin and end to change the button’s display text after clicking.
procedure TForm1.Button1Click(Sender: TObject);
begin
  Button1.Caption := 'Press again'; // input this code
end;
Code language: JavaScript (javascript)
After the program runs, clicking the button executes the code inside the block. We enter the Pascal code segment to implement various logic operations. Most GUI programs adopt this event-driven development pattern.

Press shortcut F12 to switch back to the form designer quickly.
Set Button2 Text and Close Program Event
Select Button2, change the Caption property to Exit in the Object Inspector;
Go to the OnClick event as well, click ... to jump to code, and fill in the close instruction:
procedure TForm1.Button2Click(Sender: TObject);
begin
  Close; // Close window and exit program
end;Code language: JavaScript (javascript)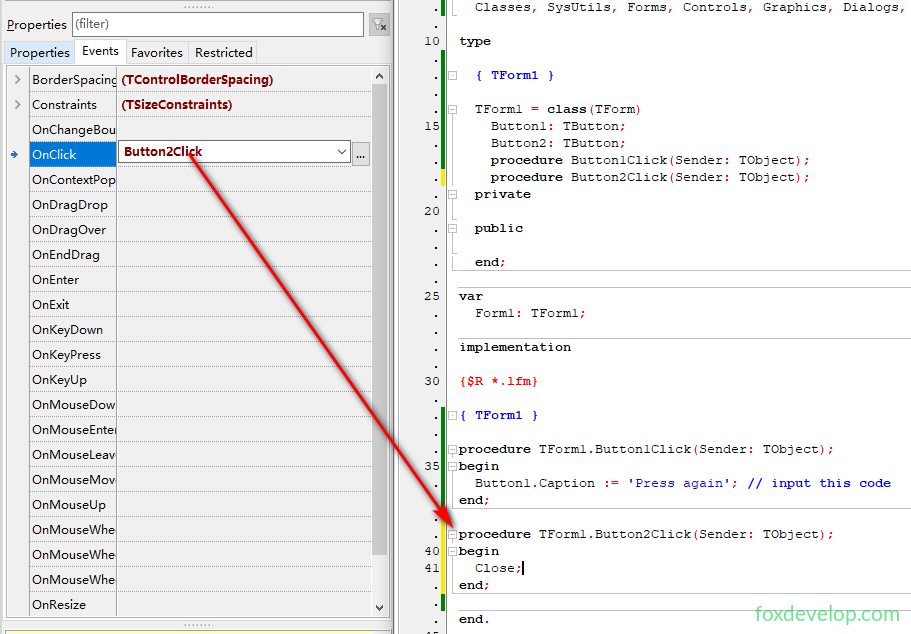
Save Project (Save Frequently)
Select Project → Save Project As from the top menu. First save the form unit file (suffix .pas);
A pop-up window will then prompt you to save the project configuration file (suffix .lpi).
Note: The unit file name and project name cannot be identical, otherwise the compiler will throw a “duplicate identifier” error.
Compile and Run the Program
Two ways to run:
- Menu:
Run → Run; - Shortcut: press
F9directly. The software compiles and links code first; if no errors exist, it launches the finished program immediately.
When running, a pure window pops up (without design grid dots), this is the main window of the software:
- Click the
Pressbutton, its text changes toPress again; - Click the
Exitbutton, the window closes and the program exits, automatically returning to the grid-based design view for further code editing.