Uso del widget de desplazamiento RecyclerView
Continuamos mejorando RecyclerView.Adapter
Los dos métodos del adaptador permiten almacenar vistas y asignar valores a los controles.
public ViewHolder onCreateViewHolder

public void onBindViewHolderLenguaje del código: PHP (php)
package com.foxdevelop.www.recyclerviewtest;
import android.annotation.SuppressLint;
import android.support.annotation.NonNull;
import android.support.v7.widget.RecyclerView;
import android.view.LayoutInflater;
import android.view.View;
import android.view.ViewGroup;
import android.widget.ImageView;
import android.widget.TextView;
import java.util.List;
public class BookAdapter extends RecyclerView.Adapter<BookAdapter.ViewHolder> {
private List<Book> books;
// Definimos una clase interna estática que hereda de RecyclerView.ViewHolder
static class ViewHolder extends RecyclerView.ViewHolder
{
ImageView imageUI;
TextView textViewUI;
public ViewHolder(View view)
{
super(view);
this.imageUI = (ImageView)view.findViewById(R.id.image_view);
this.textViewUI = (TextView)view.findViewById(R.id.text_view);
}
}
public BookAdapter(List<Book> books)
{
this.books = books;
}
@NonNull
@Override
public ViewHolder onCreateViewHolder(@NonNull ViewGroup parent, int viewType) {
View view = LayoutInflater.from(parent.getContext()).inflate(R.layout.book_list,parent,false);
ViewHolder viewHolder = new ViewHolder(view); // Pasamos la vista del elemento de RecyclerView a nuestro ViewHolder
return viewHolder;
}
@Override
public void onBindViewHolder(@NonNull ViewHolder holder, int position) {
Book book = books.get(position); // Obtener el libro actual
holder.textViewUI.setText(book.getName()); // Asignar valores a los dos controles respectivamente
holder.imageUI.setImageResource(book.getImageId());
}
@Override
public int getItemCount() {
return books.size();
}
}Lenguaje del código: JavaScript (javascript)<?xml version="1.0" encoding="utf-8"?>
<LinearLayout xmlns:android="http://schemas.android.com/apk/res/android"
android:layout_width="match_parent"
android:layout_height="wrap_content">
<ImageView
android:id="@+id/image_view"
android:layout_width="wrap_content"
android:layout_height="wrap_content"
/>
<TextView
android:id="@+id/text_view"
android:layout_width="wrap_content"
android:layout_height="wrap_content"
android:layout_marginLeft="12dp"
android:layout_gravity="center"
/>
</LinearLayout>Lenguaje del código: HTML, XML (xml)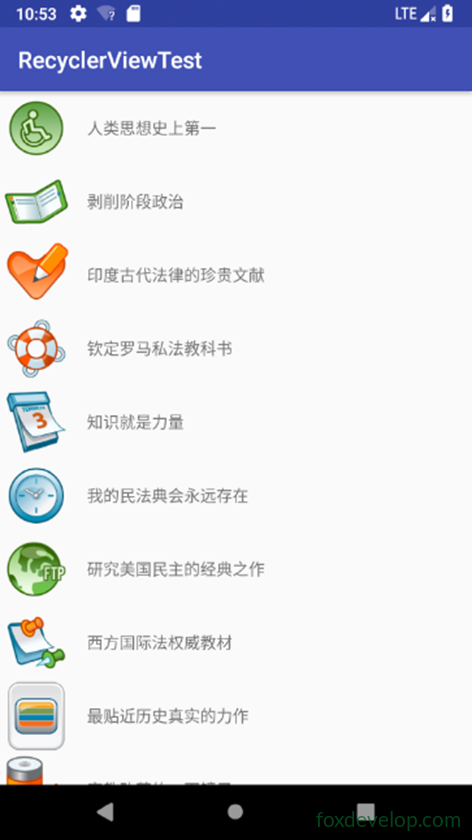
Diseño horizontal con RecyclerView
Implementar el desplazamiento horizontal en RecyclerView es muy sencillo
ListView no puede hacer esto.
Primero modificamos la vista book_list.
Modificación de la vista book_list
<?xml version="1.0" encoding="utf-8"?>
<LinearLayout xmlns:android="http://schemas.android.com/apk/res/android"
    android:orientation="vertical"
    android:layout_width="100dp"
    android:layout_height="wrap_content">
    <ImageView
        android:id="@+id/image_view"
        android:layout_width="wrap_content"
        android:layout_height="wrap_content"
        android:layout_gravity="center_horizontal"
        />

    <TextView
        android:id="@+id/text_view"
        android:layout_width="wrap_content"
        android:layout_height="wrap_content"
        android:layout_marginTop="12dp"
        android:layout_gravity="center_horizontal"
        />
</LinearLayout>Lenguaje del código: HTML, XML (xml)
Configurar la orientación de LinearLayoutManager
public class MainActivity extends AppCompatActivity {
    private List<Book> courses = new ArrayList<Book>();

    @Override
    protected void onCreate(Bundle savedInstanceState) {
         ………………
        linearLayoutManager.setOrientation(LinearLayoutManager.HORIZONTAL);
        recyclerView.setLayoutManager(linearLayoutManager);
         ……………..
    }Lenguaje del código: PHP (php)
Diseño en cascada (Waterfall) con RecyclerView
RecyclerView delega el diseño a un LayoutManager, lo que permite una gran flexibilidad.
Además de la disposición horizontal, RecyclerView también admite:
GridLayoutManager para diseños de cuadrícula
StaggeredGridLayoutManager para diseños en cascada.
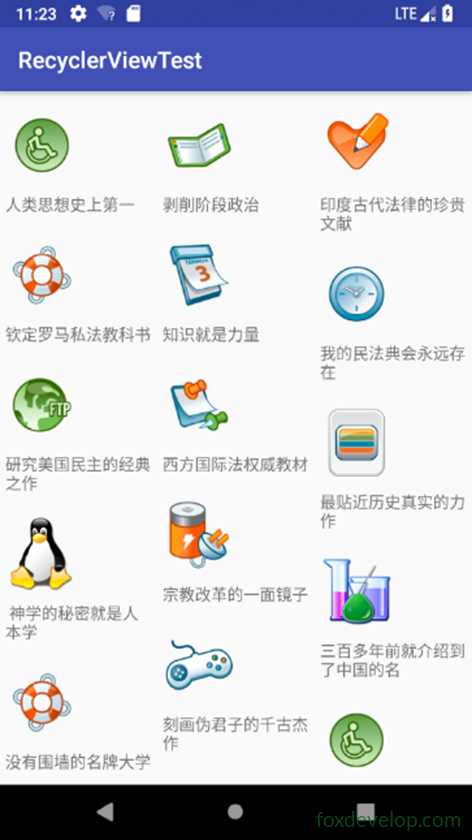
Configuración del diseño en cascada – Modificar la vista book_list
<?xml version="1.0" encoding="utf-8"?>
<LinearLayout xmlns:android="http://schemas.android.com/apk/res/android"
    android:orientation="vertical"
    android:layout_width="match_parent"
    android:layout_height="wrap_content"
    android:layout_margin="5dp"
    >
    <ImageView
        android:id="@+id/image_view"
        android:layout_width="wrap_content"
        android:layout_height="wrap_content"
        android:layout_gravity="left"
        android:layout_marginTop="10dp"
        />

    <TextView
        android:id="@+id/text_view"
        android:layout_width="wrap_content"
        android:layout_height="wrap_content"
        android:layout_marginTop="10dp"
        android:layout_gravity="left"
        />
</LinearLayout>Lenguaje del código: HTML, XML (xml)
Luego configuramos el diseño en cascada en RecyclerView
protected void onCreate(Bundle savedInstanceState) {
    super.onCreate(savedInstanceState);
    setContentView(R.layout.activity_main);
    LoadBooks();
    RecyclerView recyclerView = (RecyclerView)findViewById(R.id.testrecy);
    StaggeredGridLayoutManager sg = new StaggeredGridLayoutManager(3,StaggeredGridLayoutManager.VERTICAL);
    recyclerView.setLayoutManager(sg);
    BookAdapter bookAdapter = new BookAdapter(courses); // Pasar la fuente de datos al inicializar el adaptador
    recyclerView.setAdapter(bookAdapter);
}Lenguaje del código: JavaScript (javascript)
Diseño de tabla en cuadrícula con RecyclerView
La diferencia entre el diseño de tabla y el de cascada es que en la tabla todas las celdas tienen el mismo ancho y alto.
Mientras que en el diseño en cascada, la altura de los elementos puede variar.
La modificación es bastante sencilla.
GridLayoutManager layoutManager = new GridLayoutManager(this,3);
recyclerView.setLayoutManager(layoutManager);Lenguaje del código: JavaScript (javascript)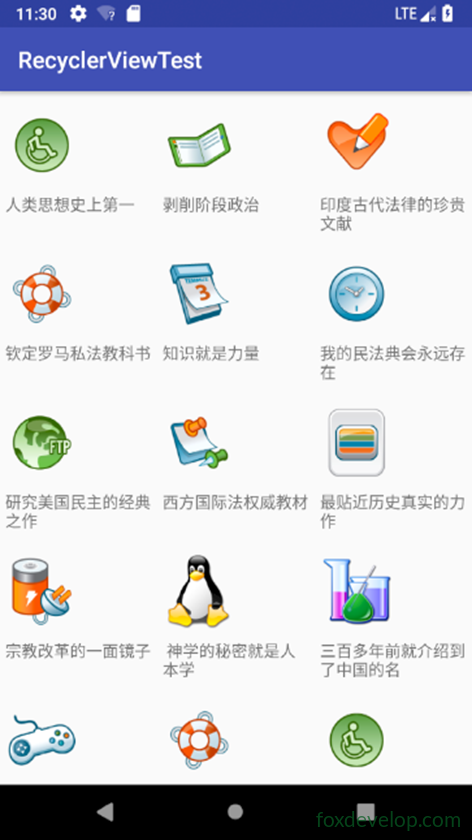
RecyclerView