Having gone through the previous lesson, you should already have your Flutter development environment set up. In this tutorial, we’ll build Flutter apps using Android Studio.
Install the Flutter Plugin
Android Studio does not support Flutter out of the box, so you’ll need to install the official Flutter plugin first.
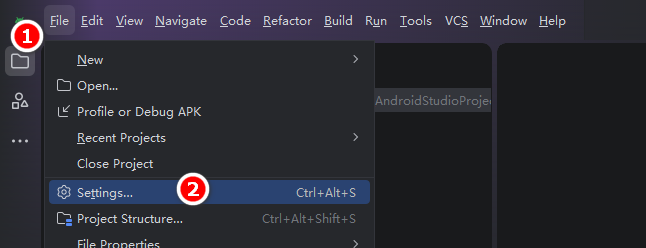
Once Android Studio opens, head to the top menu bar and select File → Settings (shortcut key: Ctrl+Alt+S)
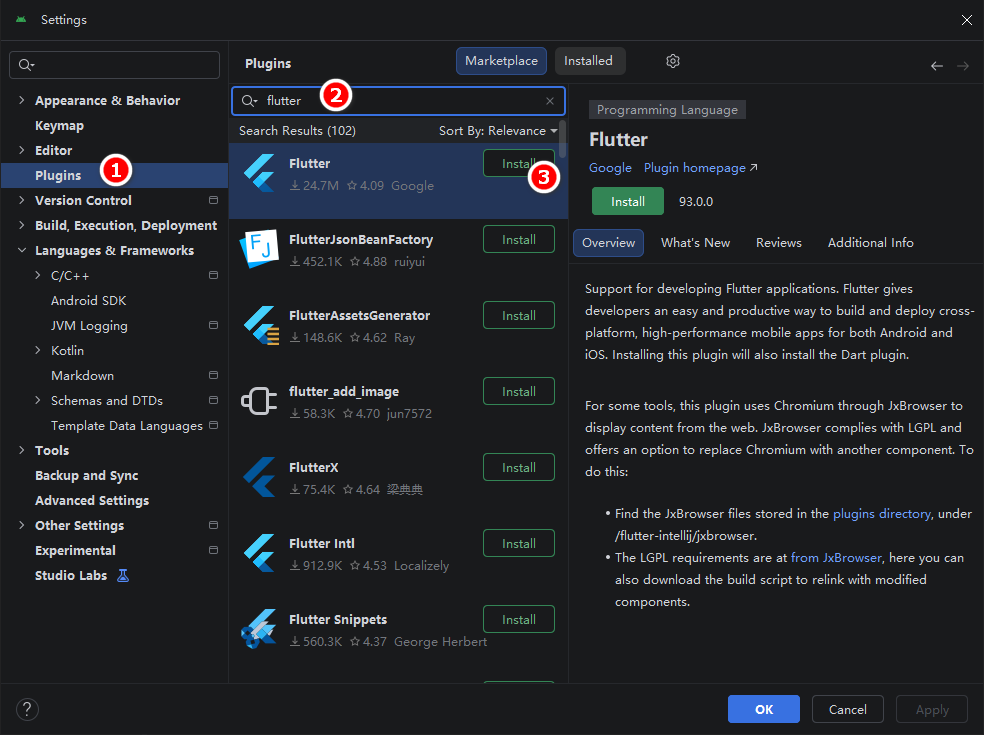
Select the Plugins tab on the left sidebar, search for “flutter”, hit Install, then restart Android Studio once installation finishes.
Set the Flutter SDK Path
Installing the plugin alone isn’t enough — you still need to point Android Studio to your local Flutter SDK folder.
File → Settings → Languages & Frameworks → Flutter
File Settings Languages & Frameworks Flutter
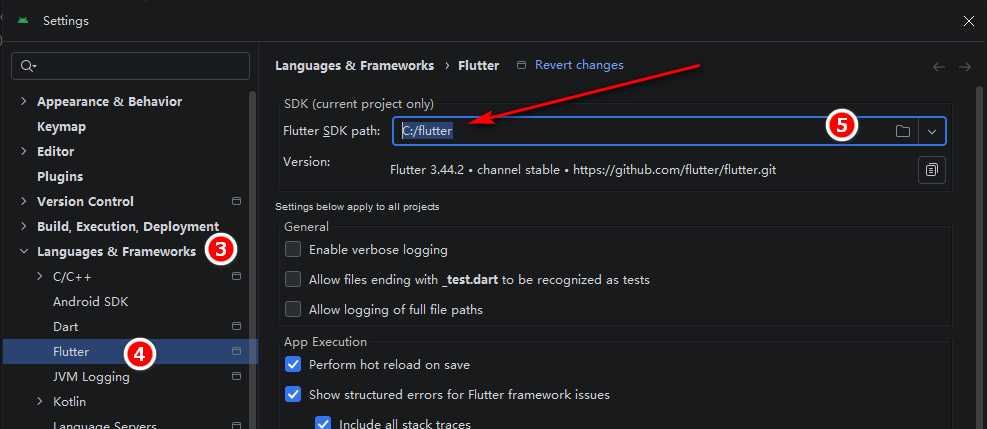
Pick the root Flutter folder — do not navigate into the bin subfolder — then click Apply.
Wait for the tooling to finish loading and configuring automatically.
Create a New Flutter Project
From here on out, creating a project works just like any regular Android Studio workflow.
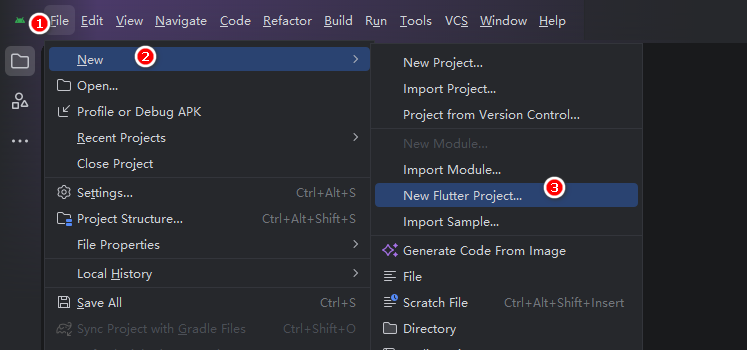
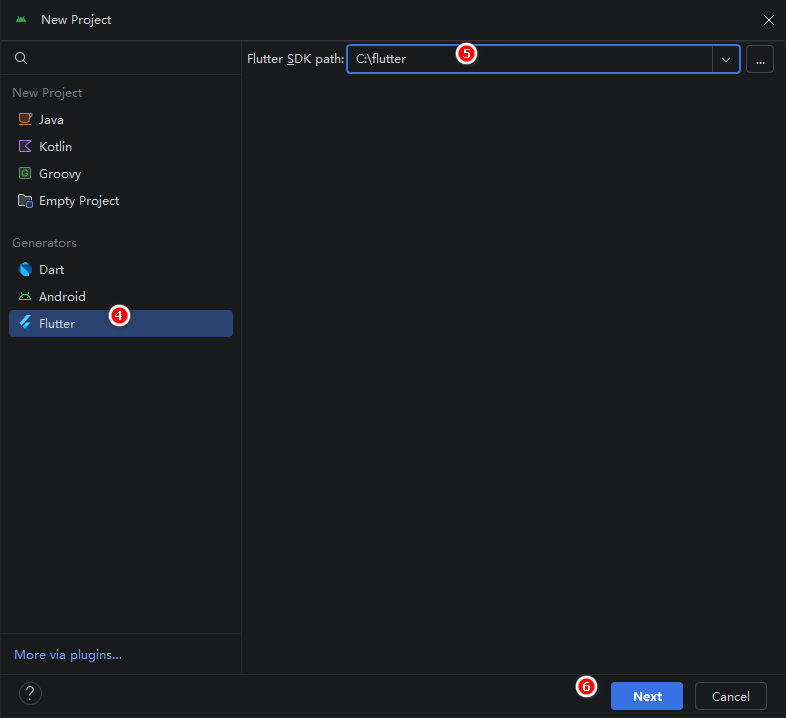
Select Flutter from the project templates, reconfirm your Flutter SDK directory on the right, then click Next.
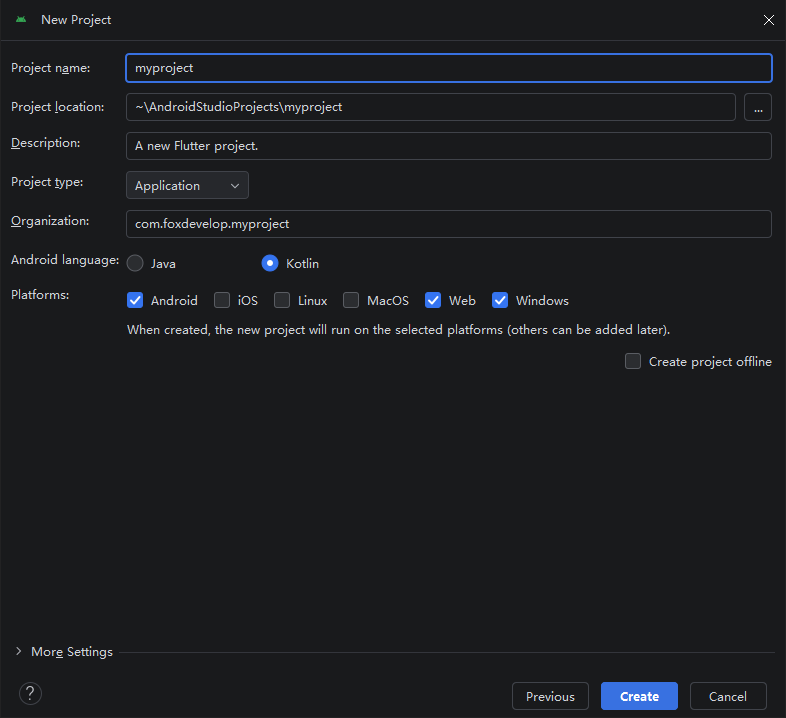
Now fill out the project setup page: enter your project name, local storage path, short project description, and organization ID. The organization ID must be globally unique — if you plan to publish on Google Play later, use your domain name written backwards. For example, I use com.foxdevelop.[projectname] here. Next, choose your Android native language; this only affects the underlying Android wrapper, you’ll still write all app logic in Dart. Under Platforms, tick every target you intend to compile for. I’ve checked Android, Web, and Windows Desktop for this demo. Check iOS, Linux, or macOS if you plan to build for those systems. When ready, click Create.
Note: Project names must use only lowercase letters, no spaces or special symbols allowed.
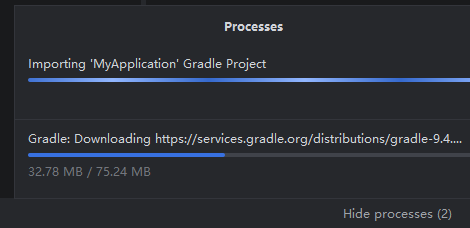
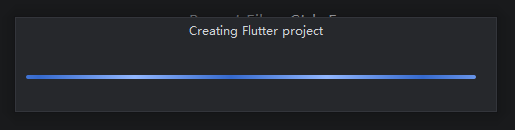
Android Studio will begin generating the project files; this process can take a little while.
Alright, I ran into an error at this stage.
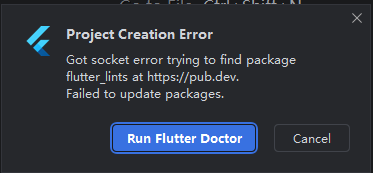
Click Run Flutter Doctor to launch the diagnostic tool and scan for setup issues.
The project loads normally afterward, but there’s a new problem.
The run button in the top right won’t launch the app, showing the following state:

I switched my UI theme, so Android Studio is now using light mode in these screenshots.
You’ll see a red X icon shown in the screenshot above — click it.
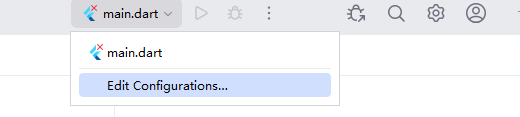
Select Edit Configurations from the dropdown menu.

A prompt will notify you the Dart SDK path hasn’t been set up. Click the Fix button on the right side of the window.
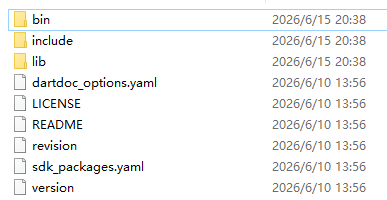
You’ll now specify the Dart SDK folder. If Flutter is installed correctly, Dart ships alongside your Flutter SDK installation.
For example, if your Flutter SDK lives here:
Your matching Dart SDK path will be:
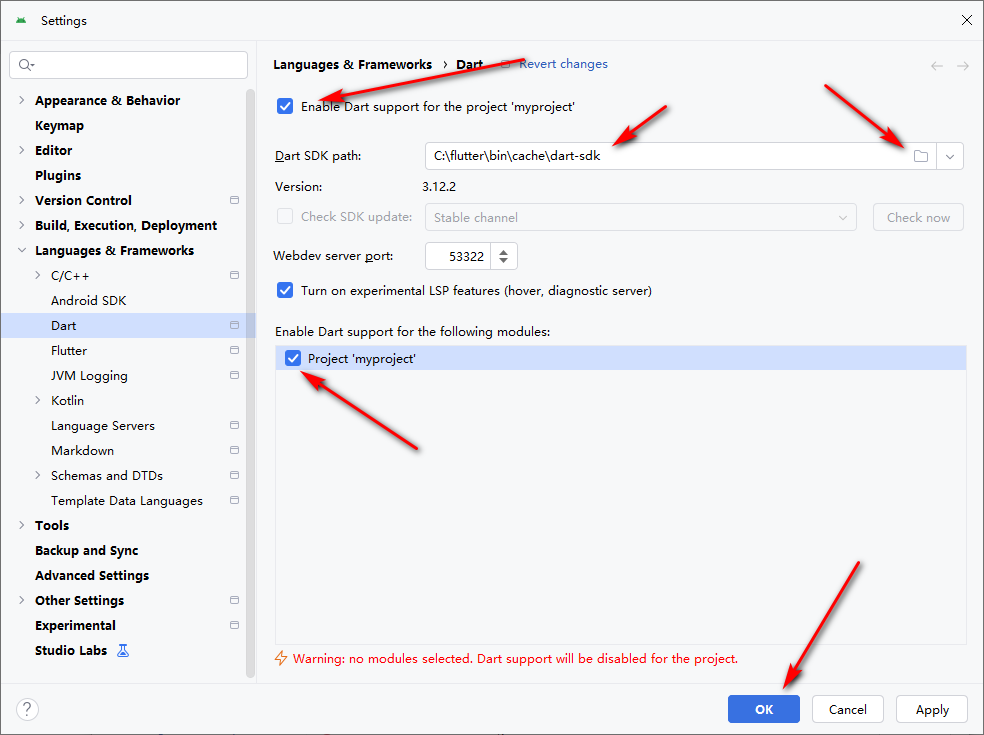
Complete the Dart SDK setup as shown in the screenshots above, then restart Android Studio once again.

After restarting, a green play triangle will appear at the top toolbar. The dropdown beside it reads Windows Desktop, meaning you can run the app as a native Windows desktop program. Click the green triangle to launch your project.
Common Build Errors & Fixes
Skip this section if you haven’t encountered the issues shown below.
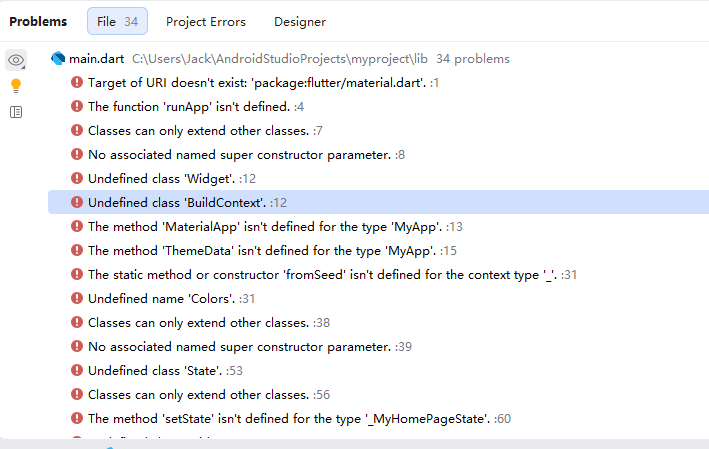
These errors pop up when package dependencies fail to download, usually caused by unstable network connections. You can resolve this by switching to domestic mirrors via terminal commands.
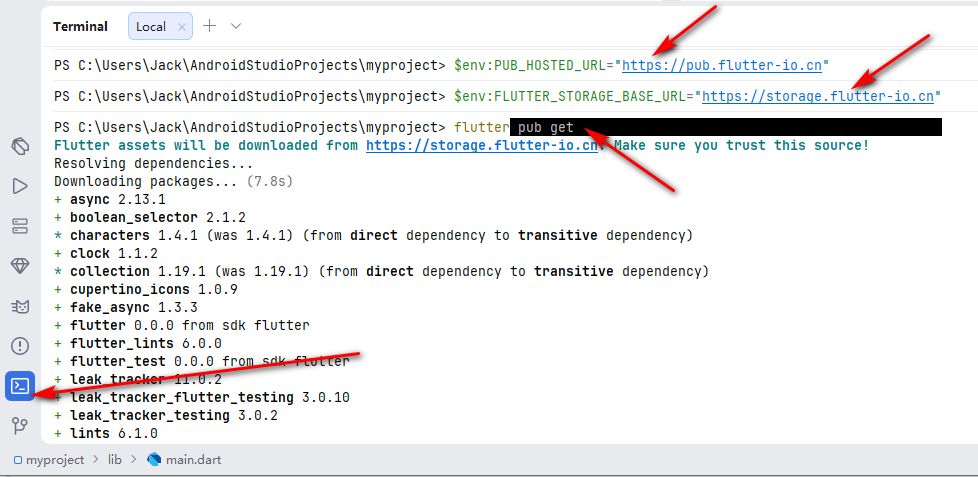
If you hit these dependency errors, open Android Studio’s built-in terminal and run the following mirror configuration commands as pictured:
$env:PUB_HOSTED_URL="https://pub.flutter-io.cn"
$env:FLUTTER_STORAGE_BASE_URL="https://storage.flutter-io.cn"

flutter pub cache repair
flutter pub getCode language: PHP (php)
Once the commands finish running, all code-related errors will disappear entirely.
Launch Your Flutter App
Click the green play button in the top-left corner to run your app. Flutter supports cross-platform debugging options: you can connect an Android phone with developer mode enabled to test the mobile build, or use Windows Desktop as your debug target if you don’t have a physical Android device handy.

The dropdown menu in the screenshot lists the three target platforms we selected during project creation. I’ve picked Windows Desktop here, then clicked the green play triangle to launch the application.
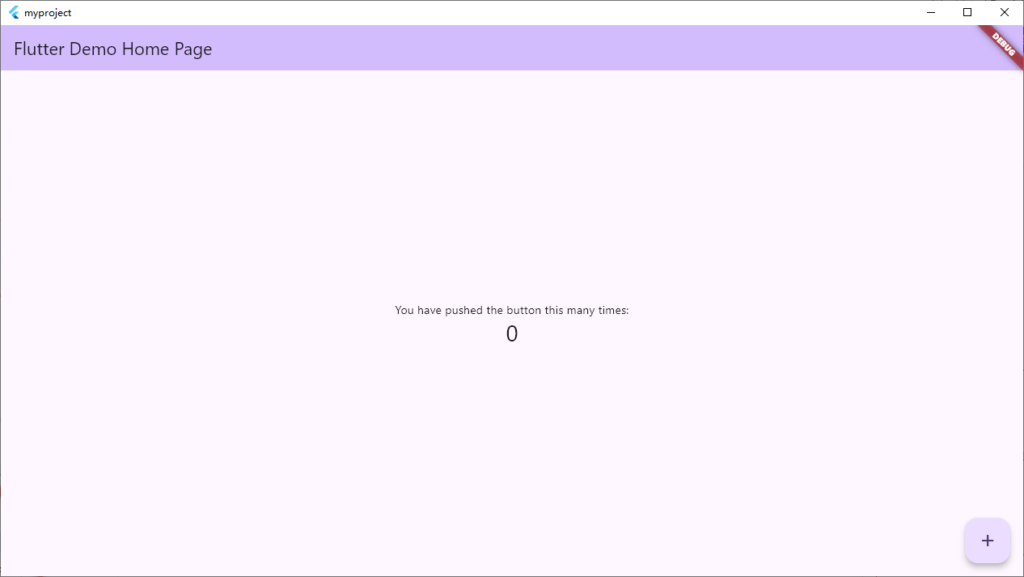
The window above shows our first fully functional Flutter application. That wraps up this lesson — feel free to experiment with the project on your own. If you run into any issues or questions, leave a comment down below.