01 – Fragment 이해하기
강의 소개
이 강의는 안드로이드 기초 지식이 있다는 전제하에 진행됩니다.
기초가 없으면 따라오기 어렵습니다.
Fragment는 ‘조각’ 또는 ‘단편’으로 번역됩니다.
사실 ‘단편’이라고 하는 것이 더 정확합니다.
이는 Activity에 삽입되는 UI 단위로,
큰 화면 공간을 더 합리적이고 효율적으로 활용할 수 있게 해줍니다.
그래서 태블릿에서 사용하기에 아주 적합합니다.
Activity와 매우 비슷하며, 레이아웃을 가지고 고유의 수명 주기도 있습니다.
미니 Activity라고 생각하면 이해하기 쉽습니다.
뉴스 앱을 개발할 때를 생각해 보세요.
스마트폰 화면이라면 이렇게 설계할 수 있습니다:
목록 Activity가 있고, 클릭하면 뉴스 상세 Activity로 이동하는 식입니다.
하지만 태블릿이라면 이렇게 하면 화면에 큰 빈 공간이 생겨 보기 좋지 않습니다.
더 나은 설계는 목록과 상세 내용을 하나의 Activity 안에 있는 두 개의 Fragment로 나누는 것입니다.
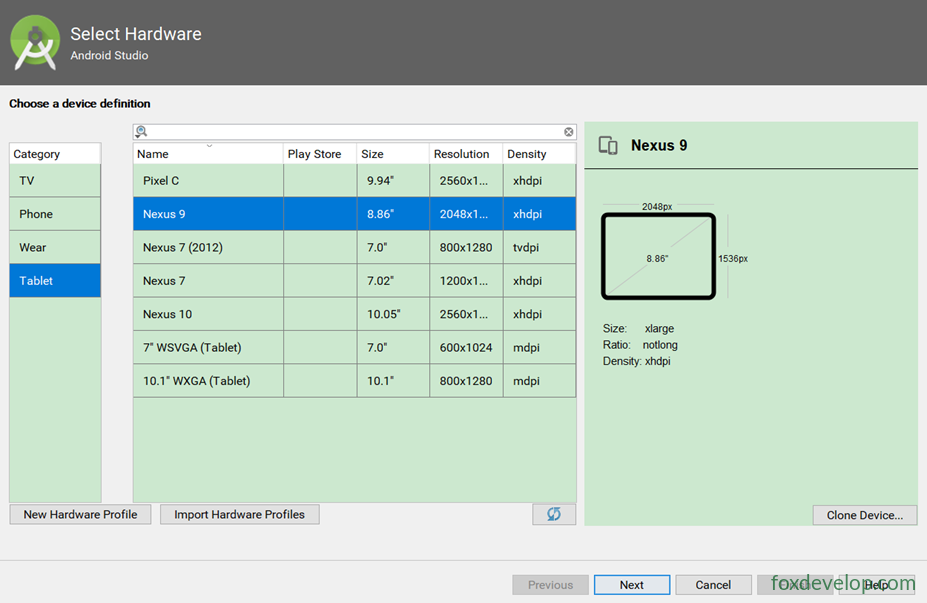
태블릿 에뮬레이터 생성
태블릿 앱을 제대로 테스트하려면 태블릿용 에뮬레이터를 하나 더 만들어야 합니다.
02 – Fragment 첫 번째 예제
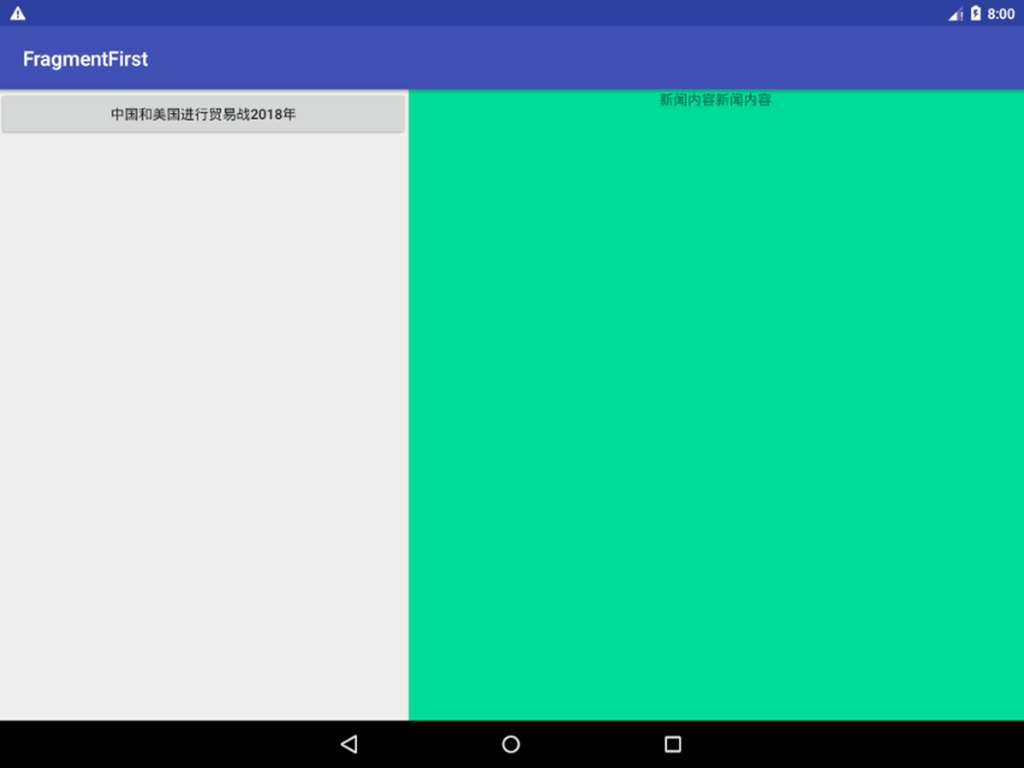
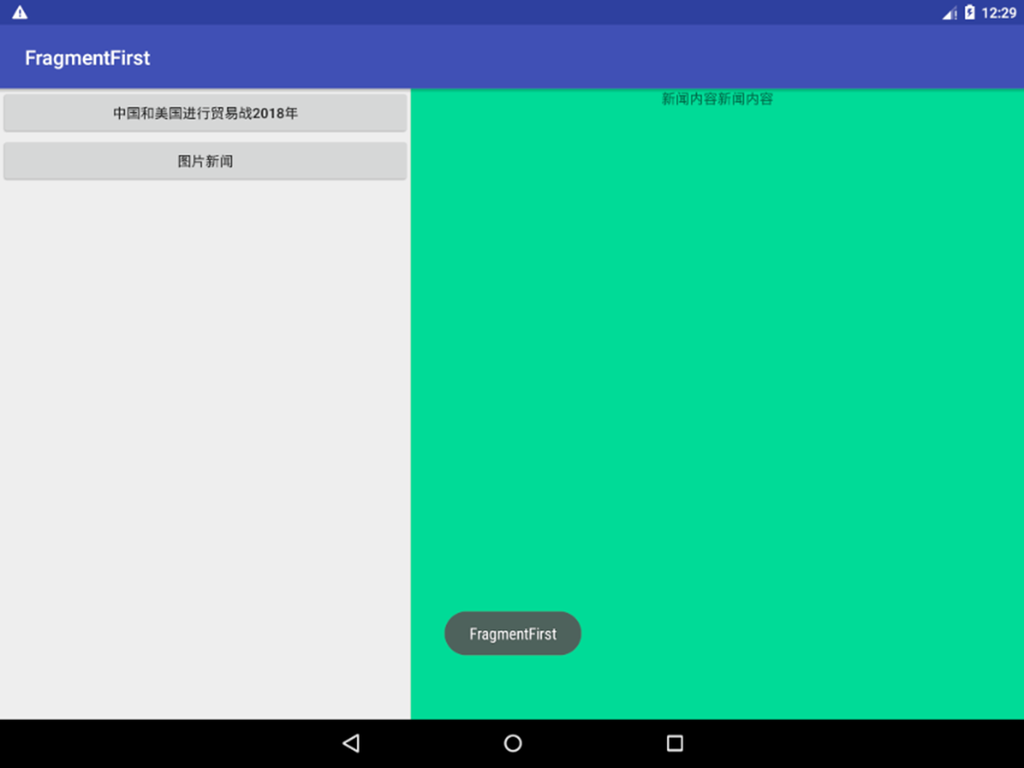
Activity에 두 개의 Fragment를 추가하고 공간을 균등하게 나눕니다.
FragmentFirst라는 새 프로젝트를 만듭니다.
두 개의 레이아웃을 추가합니다. 하나는 왼쪽 Fragment용이고,
newlist.xml
다른 하나는 오른쪽 Fragment용 레이아웃인 newdetail.xml입니다.
왼쪽 Fragment
<?xml version="1.0" encoding="utf-8"?>
<LinearLayout xmlns:android="http://schemas.android.com/apk/res/android"
    android:orientation="vertical" android:layout_width="match_parent"
    android:layout_height="match_parent">
    <Button
        android:id="@+id/buttondialog"
        android:layout_width="match_parent"
        android:layout_height="wrap_content"
        android:text="2018년 미·중 무역 전쟁" />
</LinearLayout>Code language: HTML, XML (xml)
오른쪽 Fragment
<?xml version="1.0" encoding="utf-8"?>
<LinearLayout xmlns:android="http://schemas.android.com/apk/res/android"
    android:orientation="vertical" android:layout_width="match_parent"
    android:layout_height="match_parent"
    android:background="#0ddb97"
    >
    <TextView
        android:layout_width="wrap_content"
        android:layout_height="wrap_content"
        android:layout_gravity="center_horizontal"
        android:text="뉴스 내용 뉴스 내용" />
</LinearLayout>Code language: HTML, XML (xml)
Fragment 클래스 추가
NewListFragment를 추가합니다.
android.support.v4.app.Fragment를 상속받습니다.
그리고 onCreateView 메서드를 오버라이드하여 이 Fragment가 newlist xml을 사용하도록 합니다.
public class NewListFragment extends Fragment {
    @Nullable
    @Override
    public View onCreateView(@NonNull LayoutInflater inflater, @Nullable ViewGroup container,
                             @Nullable Bundle savedInstanceState) {
        View view = inflater.inflate(R.layout.newlist,container,false);
        return view;
    }
}Code language: PHP (php)
같은 방식으로 뉴스 상세 Fragment도 추가합니다.
NewDetailFragment도 상속받습니다.
android.support.v4.app.Fragment
public class NewDetailFragment extends Fragment {
    @Nullable
    @Override
    public View onCreateView(@NonNull LayoutInflater inflater, @Nullable ViewGroup container, @Nullable Bundle savedInstanceState) {
        View view = inflater.inflate(R.layout.newdetail,container,false);
        return view;
    }
}Code language: PHP (php)
메인 Activity 레이아웃에서 Fragment 호출
android:name=”com.foxdevelop.” 속성을 사용하여 어떤 Fragment를 사용할지 설정합니다.
메인 레이아웃에 Fragment를 추가할 때 id는 필수입니다.
<?xml version="1.0" encoding="utf-8"?>
<LinearLayout xmlns:android="http://schemas.android.com/apk/res/android"
    android:orientation="horizontal" android:layout_width="match_parent"
    android:layout_height="match_parent">
    <fragment
        android:id="@+id/newlist_fragment"
        android:layout_width="0dp"
        android:layout_height="match_parent"
        android:layout_weight="2"
        android:name="com.foxdevelop.www.fragmentfirst.NewListFragment"
        />
    <fragment
        android:id="@+id/newdetail_fragment"
        android:layout_width="0dp"
        android:layout_height="match_parent"
        android:layout_weight="3"
        android:name="com.foxdevelop.www.fragmentfirst.NewDetailFragment"
        />
</LinearLayout>Code language: HTML, XML (xml)
03 – Fragment 동적 추가
Fragment의 진정한 강력함은 앱 실행 중에 동적으로 Activity에 추가할 수 있다는 점입니다.
상황에 맞춰 동적으로 Fragment를 추가하면 훨씬 다양한 화면을 구성할 수 있습니다.
예를 들어 뉴스 앱에서 어떤 기사는 이미지 뉴스, 어떤 기사는 텍스트 뉴스, 또 어떤 기사는 동영상 뉴스일 수 있습니다. 뉴스 유형에 따라 다른 Fragment 레이아웃을 사용할 수 있습니다.
new_picture 레이아웃을 추가해 보겠습니다.
<?xml version="1.0" encoding="utf-8"?>
<LinearLayout xmlns:android="http://schemas.android.com/apk/res/android"
    android:orientation="vertical" android:layout_width="match_parent"
    android:layout_height="match_parent">
    <ImageView
        android:layout_width="match_parent"
        android:layout_height="match_parent"
        android:src="@drawable/birdsee"
        />
</LinearLayout>Code language: HTML, XML (xml)
구별을 위해 이미지 한 장을 표시합니다.
이미지용 Fragment 클래스 추가
public class NewImageFragment extends Fragment {
    @Nullable
    @Override
    public View onCreateView(@NonNull LayoutInflater inflater, @Nullable ViewGroup container,
                             @Nullable Bundle savedInstanceState) {
        View view = inflater.inflate(R.layout.new_picture,container,false);
        return view;
    }
}Code language: PHP (php)
메인 레이아웃에서 FrameLayout 사용
여기서는 프레임 레이아웃을 사용합니다.
<?xml version="1.0" encoding="utf-8"?>
<LinearLayout xmlns:android="http://schemas.android.com/apk/res/android"
    android:orientation="horizontal" android:layout_width="match_parent"
    android:layout_height="match_parent">
    <fragment
        android:id="@+id/newlist_fragment"
        android:layout_width="0dp"
        android:layout_height="match_parent"
        android:layout_weight="2"
        android:name="com.foxdevelop.www.fragmentfirst.NewListFragment"
        />

    <FrameLayout
        android:id="@+id/framelayout"
        android:layout_width="0dp"
        android:layout_height="match_parent"
        android:layout_weight="3"
        ></FrameLayout>
</LinearLayout>Code language: HTML, XML (xml)
왼쪽에 두 개의 버튼 추가
<?xml version="1.0" encoding="utf-8"?>
<LinearLayout xmlns:android="http://schemas.android.com/apk/res/android"
    android:orientation="vertical" android:layout_width="match_parent"
    android:layout_height="match_parent">
    <Button
        android:id="@+id/buttondialog"
        android:layout_width="match_parent"
        android:layout_height="wrap_content"
        android:text="2018년 미·중 무역 전쟁" />
    <Button
        android:id="@+id/buttonpicture"
        android:layout_width="match_parent"
        android:layout_height="wrap_content"
        android:text="이미지 뉴스" />
</LinearLayout>Code language: HTML, XML (xml)
메인 Activity에서 버튼에 이벤트 추가
버튼에 클릭 이벤트를 설정하고, 눌린 버튼에 따라 다른 Fragment를 동적으로 로드합니다.
package com.foxdevelop.www.fragmentfirst;

import android.support.v4.app.Fragment;
import android.support.v4.app.FragmentManager;
import android.support.v7.app.AppCompatActivity;
import android.os.Bundle;
import android.view.View;
import android.widget.Button;

public class MainActivity extends AppCompatActivity implements View.OnClickListener {

    @Override
    protected void onCreate(Bundle savedInstanceState) {
        super.onCreate(savedInstanceState);
        setContentView(R.layout.activity_main);
        // 두 버튼에 이벤트 바인딩
        Button b1 = (Button)findViewById(R.id.buttonarticle);
        b1.setOnClickListener(this);
        Button b2 = (Button)findViewById(R.id.buttonpicture);
        b1.setOnClickListener(this);
    }

    @Override
    public void onClick(View view) {
        // 눌린 버튼에 따라 다른 Fragment 설정
        switch (view.getId())
        {
            case R.id.buttonarticle:
                setFragement(new NewDetailFragment());
                break;
            case R.id.buttonpicture:
                setFragement(new NewImageFragment());
                break;
            default:
                break;
        }
    }

    // 이 메서드는 프레임 레이아웃에 Fragment를 설정합니다
    public void setFragement(Fragment fragement) {
        FragmentManager fragementManager = getSupportFragmentManager();
        // 트랜잭션 시작
        android.support.v4.app.FragmentTransaction fragmentTransaction = fragementManager.beginTransaction();
        fragmentTransaction.replace(R.id.framelayout,fragement);// 프레임 레이아웃에 전달된 Fragment 설정
        fragmentTransaction.commit();
    }
}Code language: JavaScript (javascript)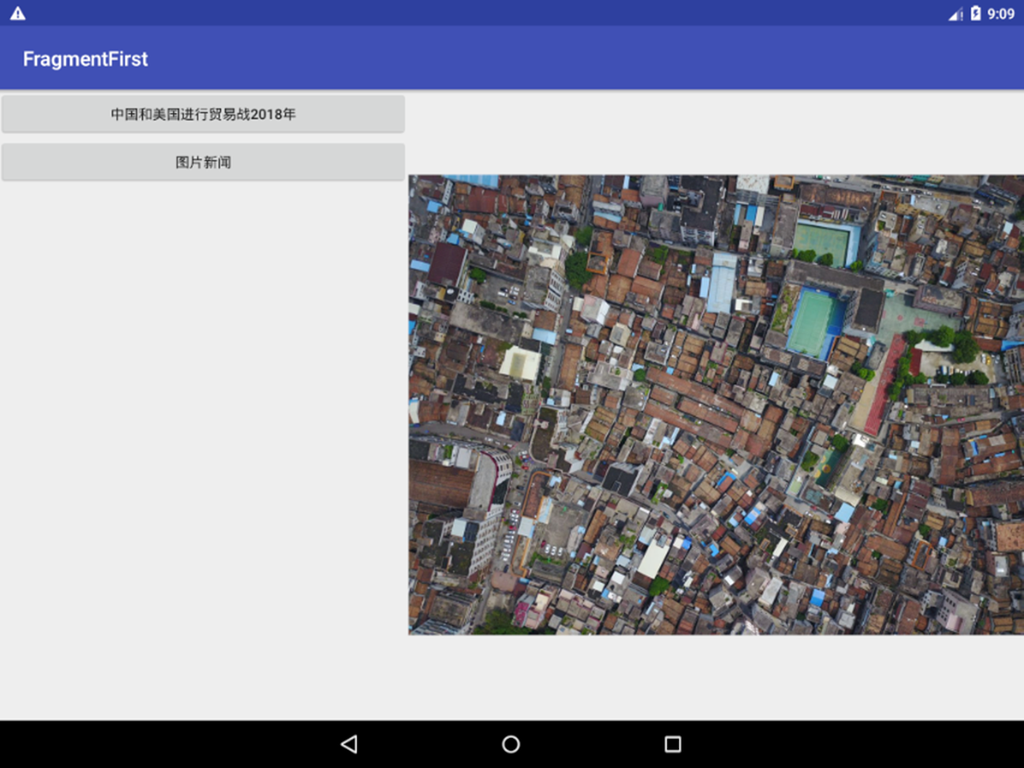
04 – Fragment에서 백 스택 사용
백 스택에 대한 내용은 기초 강의에서 다루었습니다.
앞선 예제에서 뒤로 가기 키를 누르면 앱이 메인 Activity를 벗어나며 프로그램이 종료됩니다. 하지만 우리가 원하는 동작은 뒤로 가기 키를 눌렀을 때 이전 Fragment로 돌아가는 것입니다.
Fragment가 백 스택을 지원하게 만드는 것은 사실 아주 간단합니다.
트랜잭션을 백 스택에 추가하기만 하면 됩니다.
// 이 메서드는 프레임 레이아웃에 Fragment를 설정합니다
public void setFragement(Fragment fragement) {
    FragmentManager fragementManager = getSupportFragmentManager();
    // 트랜잭션 시작
    android.support.v4.app.FragmentTransaction fragmentTransaction = fragementManager.beginTransaction();
    fragmentTransaction.replace(R.id.framelayout,fragement);// 프레임 레이아웃에 전달된 Fragment 설정
    fragmentTransaction.addToBackStack(null);// 트랜잭션을 백 스택에 추가
    fragmentTransaction.commit();
}Code language: JavaScript (javascript)
05 – Fragment와 Activity 간의 통신
Fragment는 Activity에 삽입되어 있지만, 실제로는 그 관계가 그렇게 긴밀하지 않습니다.
Fragment와 Activity는 사실상 독립적인 클래스로 존재합니다.
둘 사이에 직접적으로 통신할 방법은 따로 마련되어 있지 않습니다.
통신을 쉽게 하기 위해,
FragmentManager는 findViewById와 비슷한 메서드를 제공하여 레이아웃에서 Fragment 인스턴스를 가져올 수 있게 해줍니다.
getFragmentManager android.support.v4.app.Fragment
캐스팅이 필요합니다. 교재에는 이 내용이 없습니다.
android.support.v4.app.Fragment 패키지(v4 패키지)를 임포트했다면
import android.support.v4.app.Fragment;
FragmentManager를 가져올 때 다음을 사용해야 합니다:
FragmentManager fm = getSupportFragmentManager();
해당 Fragment도 올바른 패키지를 임포트해야 합니다!
// Activity의 onCreate 메서드에서 Fragment 인스턴스 가져오기
NewListFragment newListFragment = (NewListFragment)getSupportFragmentManager().findFragmentById(R.id.newlist_fragment);
Toast.makeText(this, newListFragment.getId()+"xxxx",Toast.LENGTH_LONG).show();Code language: JavaScript (javascript)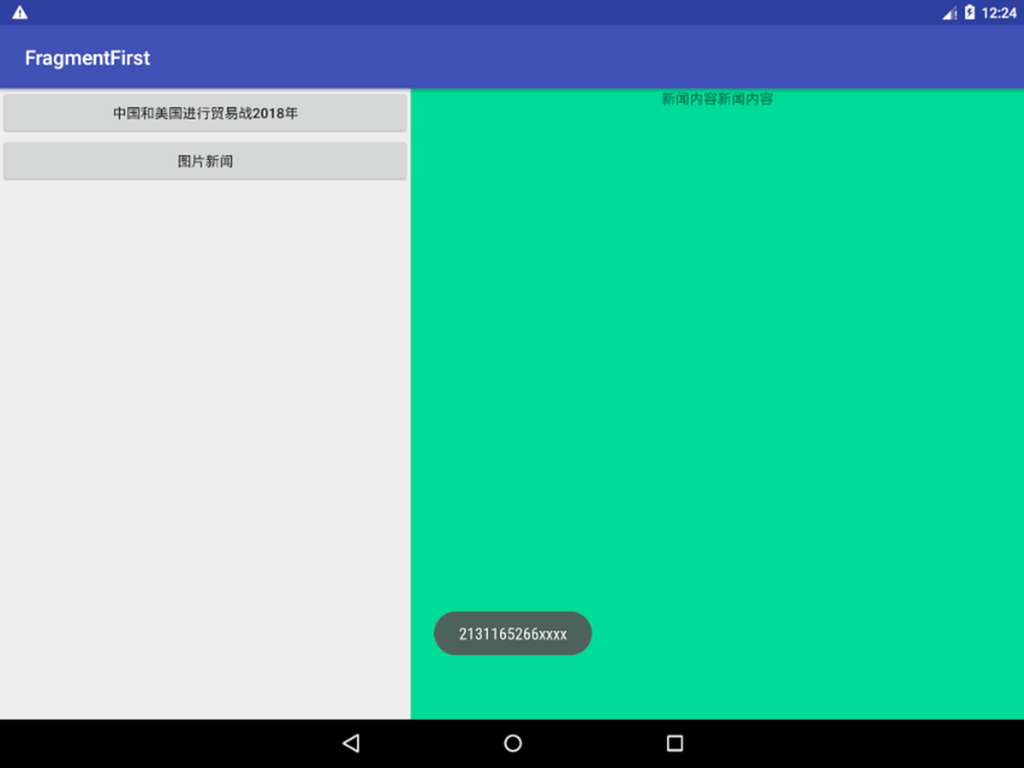
Fragment에서 Activity 가져오기
// Fragment에서 Activity 가져오기
MainActivity mainActivity = (MainActivity) getActivity();
Toast.makeText(getContext(), mainActivity.getTitle(),Toast.LENGTH_LONG).show();Code language: JavaScript (javascript)
getActivity() 메서드를 호출하면 됩니다.
06 – Fragment의 수명 주기
Fragment의 수명 주기는 Activity와 거의 같습니다.
Fragment에도 네 가지 상태가 있습니다.
실행 중, 일시 정지, 정지, 소멸.
1. 실행 중 상태: Fragment가 보이고, 소속된 Activity가 실행 중 상태이면 해당 Fragment도 활성 상태입니다.
2. 일시 정지 상태
화면을 다 채우지 않는 다른 Activity가 백 스택 맨 위에 추가되면, 그 Activity가 관리하는 보이는 Fragment는 일시 정지 상태가 됩니다.
3. 정지 상태
Activity가 정지 상태가 되면 관련 Fragment도 정지 상태가 됩니다. 또는 FragmentTransaction의 remove나 replace 메서드로 Fragment를 Activity에서 제거할 때, 트랜잭션 커밋 전에 addToBackStack을 호출했다면 정지 상태가 됩니다.
요약하자면, 정지 상태의 Fragment는 사용자에게 보이지 않으며 언제든 시스템에 의해 회수될 수 있습니다.
4. 소멸 상태
Fragment는 항상 Activity에 의존합니다. 따라서 Activity가 소멸되면 관련 Fragment도 소멸 상태가 됩니다. 또는 FragmentTransaction의 remove나 replace 메서드로 Fragment를 제거할 때, 커밋 전에 addToBackStack을 호출하지 않았다면 소멸 상태가 됩니다.
Activity와 마찬가지로 Fragment도 일련의 콜백 메서드를 제공하여 수명 주기의 각 단계를 다룹니다. Activity에 있는 것은 Fragment에도 거의 다 있습니다.
동시에 Fragment에는 몇 가지 추가 콜백 메서드도 제공됩니다.
Fragment