上一堂課我們在 XAML 裡新增了按鈕,並產生點擊事件;一開始實作的功能是點擊按鈕後變更按鈕上的文字。
先回到 XAML 檔,我們要幫按鈕設定名稱 x:Name="btnAdd",這樣才能在後端 C++ 程式裡操作這個按鈕物件。
<Grid>
    <Button x:Name="btnAdd" Content="Click Me" HorizontalAlignment="Center" VerticalAlignment="Center" Click="OnButtonClick"/>
</Grid>Code language: HTML, XML (xml)
接著到 MainWindow.xaml.cpp 找到 OnButtonClick 事件的實作函式
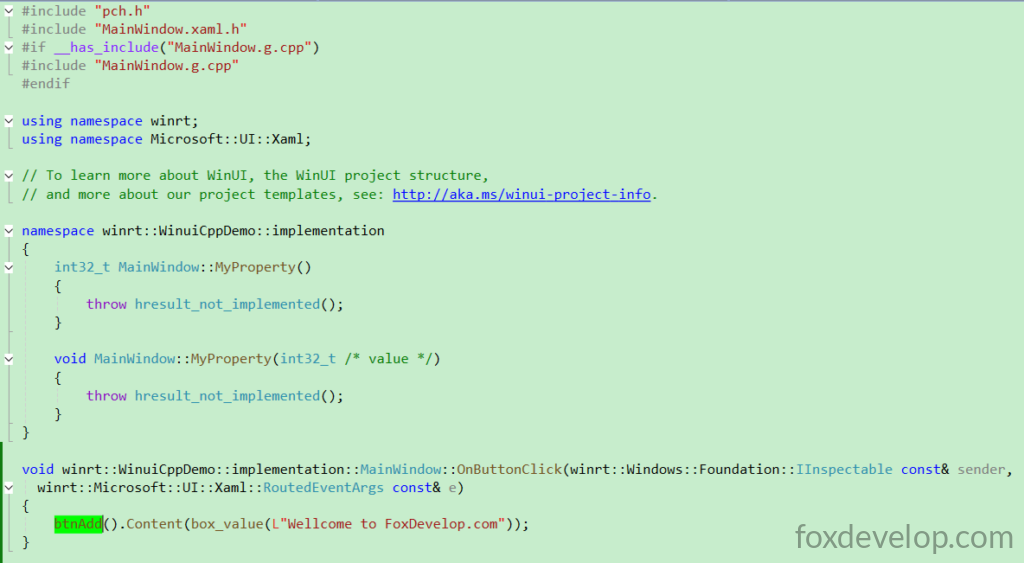
就能透過前面定義的 btnAdd 直接取得該按鈕物件。
點擊按鈕時,就把它的 Content 內容改成「Welcome to FoxDevelop.com」。
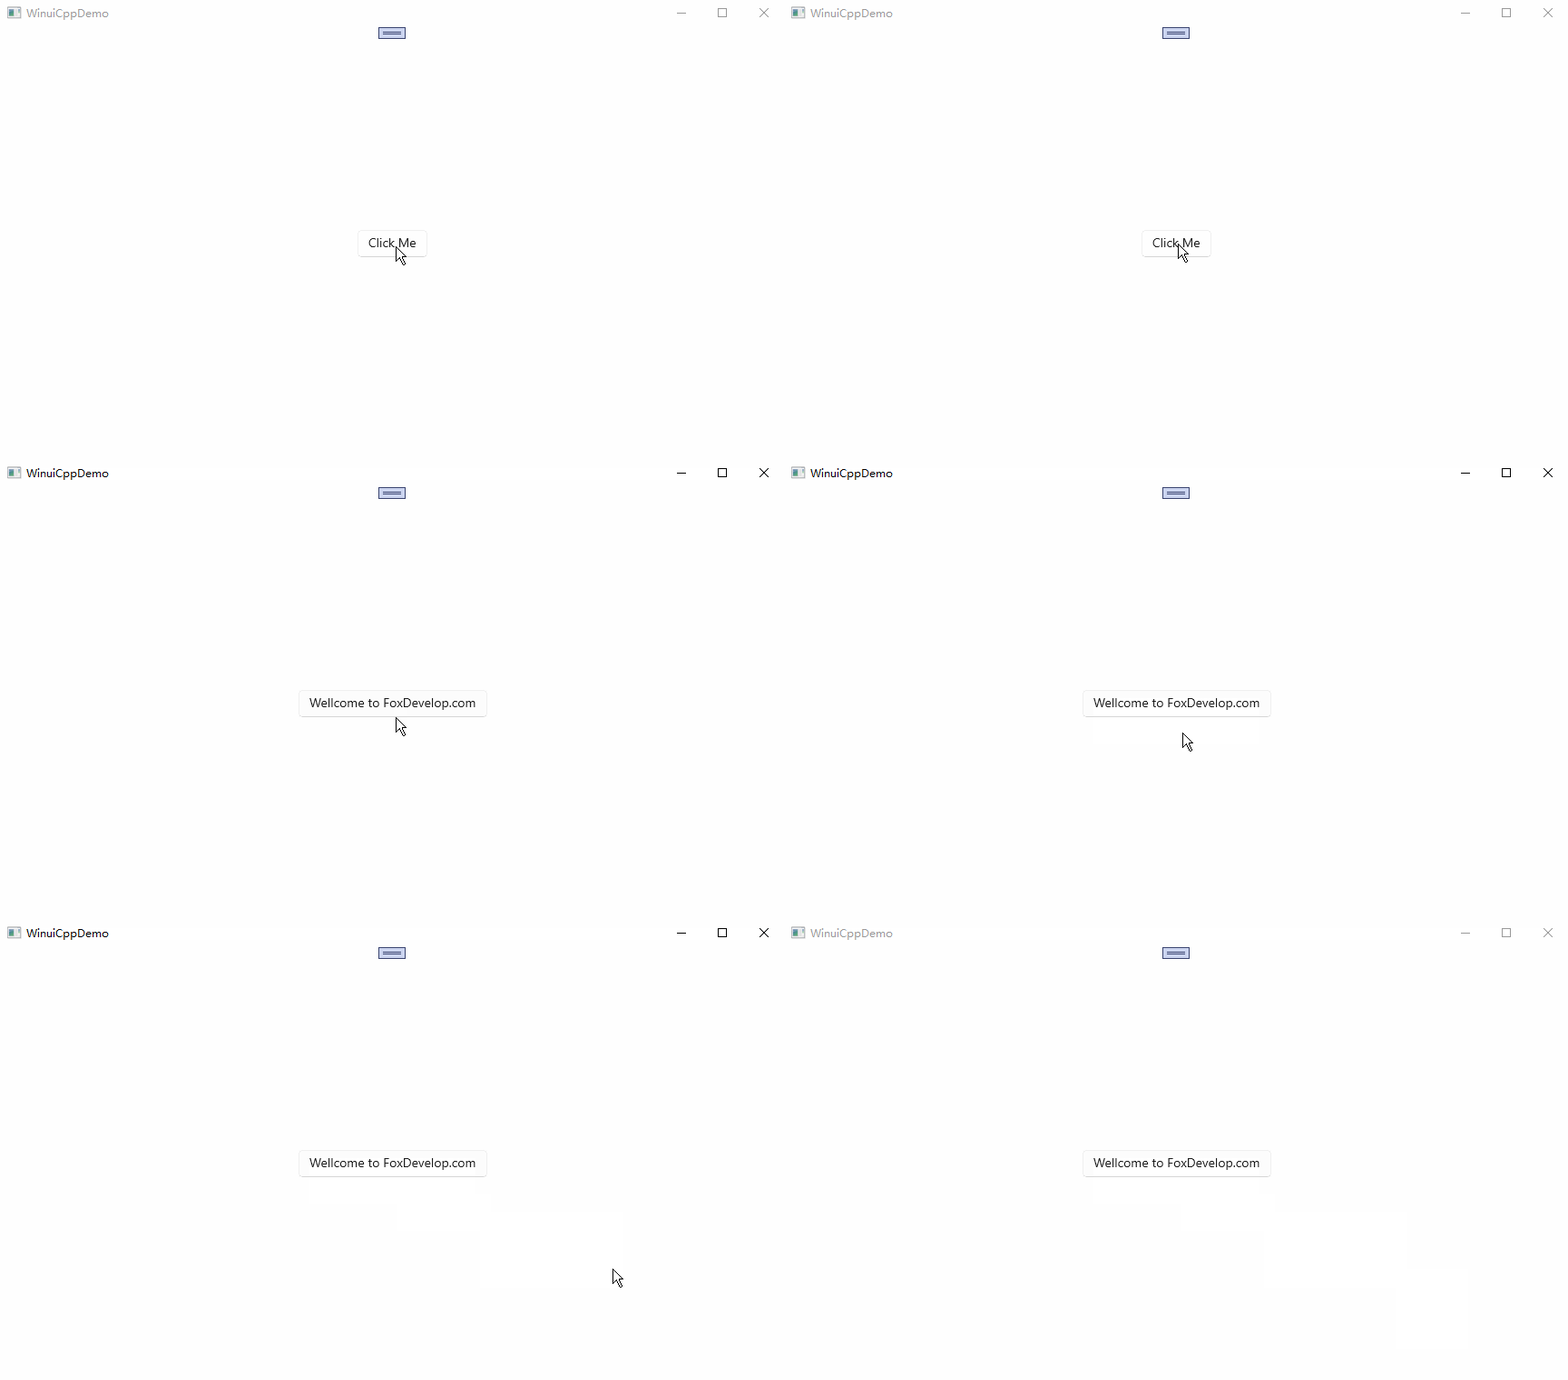
接下來執行專案看效果。
void winrt::WinuiCppDemo::implementation::MainWindow::OnButtonClick(winrt::Windows::Foundation::IInspectable const& sender,
winrt::Microsoft::UI::Xaml::RoutedEventArgs const& e)
{
    btnAdd().Content(box_value(L"Welcome to FoxDevelop.com"));
}
Code language: C++ (cpp)
可以看見點擊後能夠修改 UI 控制項屬性。接下來我們建立一個整數屬性來記錄點擊次數,每點擊一次數值就加一,並將這個屬性綁定到畫面上的文字方塊,讓介面自動同步最新數值。
屬性綁定
為了避免先前範例程式碼互相干擾,讀者可以重新建立空白專案練習。
請依照以下步驟操作:
修改 XAML,新增一個 TextBlock 文字方塊
<?xml version="1.0" encoding="utf-8"?>
<Window
    x:Class="WinuiDemo.MainWindow"
    xmlns="http://schemas.microsoft.com/winfx/2006/xaml/presentation"
    xmlns:x="http://schemas.microsoft.com/winfx/2006/xaml"
    xmlns:local="using:WinuiDemo"
    xmlns:d="http://schemas.microsoft.com/expression/blend/2008"
    xmlns:mc="http://schemas.openxmlformats.org/markup-compatibility/2006"
    mc:Ignorable="d"
    Title="WinuiDemo">

    <Grid>
        <TextBlock Text="{x:Bind MyProperty}" FontSize="24"/>
    </Grid>
</Window>
Code language: C++ (cpp)
接著在 .cpp 檔裡,讓 MyProperty 直接回傳一個數字
namespace winrt::WinuiDemo::implementation
{
    int32_t MainWindow::MyProperty()
    {
        return 100;
    }

    void MainWindow::MyProperty(int32_t /* value */)
    {
        throw hresult_not_implemented();
    }
}
Code language: C++ (cpp)
接著執行建置與執行
如果你的開發環境出現以下錯誤,且建置流程持續卡住不動
Build started at 14:42...
1>------ Build started: Project: WinuiCppDemo, Configuration: Debug x64 ------
1>WindowsAppSDKMLDeploymentMode=Framework
1>MainWindow.xaml.cpp
錯誤內容如下:
#error directive: "C++/WinRT no longer supports pre-standardization coroutines.
If you use co_await, switch to /await:strict or upgrade to C++20. If you do not,
 remove /await from the compiler flags."Code language: PHP (php)
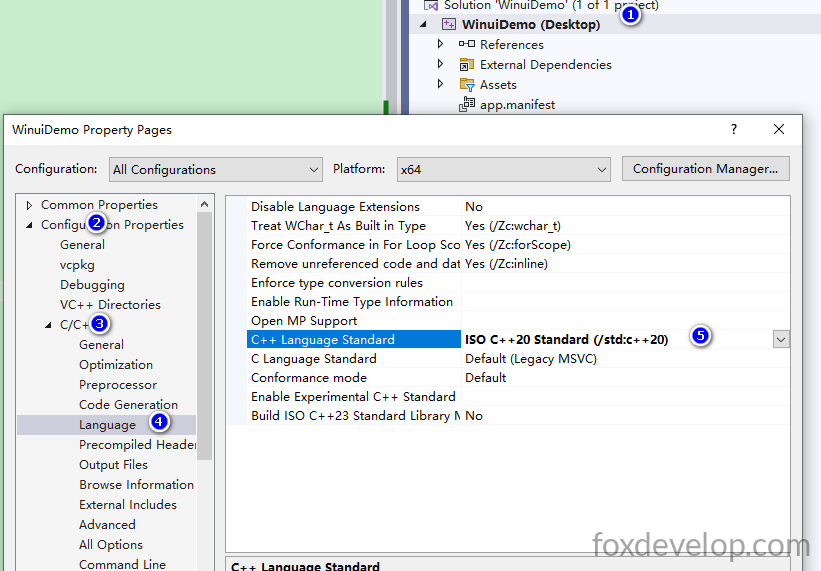
升級至 C++20 標準
WinUI 3 與 C++/WinRT 皆以標準協同程式(coroutine)為基礎,升級後後續維護會更順利。
前往 專案屬性 → C/C++ → 語言 → C++ 語言標準,選擇 C++20。
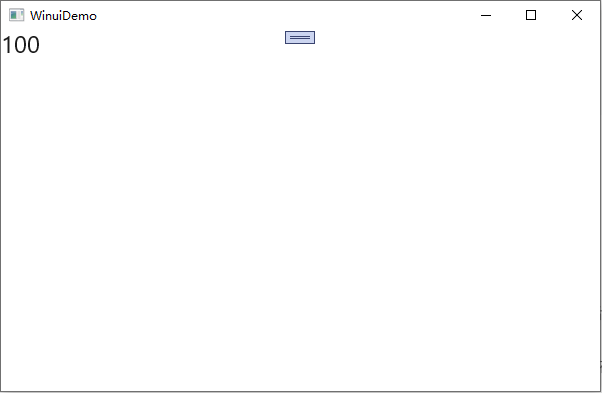
再次執行建置,整個過程會耗費非常久的時間,並會在專案路徑 D:\Demos\WinuiDemo\WinuiDemo\x64\Debug 產生高達 1.3GB 的中繼檔案,這也是建置緩慢的主因;實際耗時會依電腦硬體配備有所差異。建置成功後執行程式,畫面就會顯示數字 100。
int32_t MainWindow::MyProperty()
    {
        return 100;
    }Code language: C++ (cpp)
畫面會直接輸出這個屬性回傳的數值。
實作按鈕點擊、計數器累加功能
接下來新增按鈕,並綁定點擊事件
<?xml version="1.0" encoding="utf-8"?>
<Window
    x:Class="WinuiDemo.MainWindow"
    xmlns="http://schemas.microsoft.com/winfx/2006/xaml/presentation"
    xmlns:x="http://schemas.microsoft.com/winfx/2006/xaml"
    xmlns:local="using:WinuiDemo"
    xmlns:d="http://schemas.microsoft.com/expression/blend/2008"
    xmlns:mc="http://schemas.openxmlformats.org/markup-compatibility/2006"
    mc:Ignorable="d"
    Title="WinuiDemo">

    <StackPanel Orientation="Vertical">
        <TextBlock Text="{x:Bind MyProperty}" FontSize="24"/>
        <Button Content="Click Me" Click="Button_Click"/>
    </StackPanel>
</Window>
Code language: HTML, XML (xml)
滑鼠游標移到 Click=”Button_Click” 內的 Button_Click 文字上,按下鍵盤 F12,VS 會自動在 .h 與 .cpp 自動產生事件函式定義與實作框架。
void Button_Click(winrt::Windows::Foundation::IInspectable const& sender, winrt::Microsoft::UI::Xaml::RoutedEventArgs const& e);
寫法與前面範例相同。接下來我們需要宣告一個 int32_t 私有成員變數,用來存放點擊次數。
首先在 MainWindow.xaml.h 標頭檔加入整數屬性,負責存放計數值
寫在 .idl 檔的屬性僅是對外開放的介面,負責外部存取;真正儲存數據的欄位需要我們自行宣告。
在 IDL 撰寫
Int32 MyProperty時,會讓類別對外暴露一個可讀可寫的 Int32 屬性。編譯器會自動產生 Get/Set 虛函式與屬性變更事件
MyPropertyChanged
int32_t m_myPropValue = 0; // 私有變數,儲存點擊次數!Code language: C++ (cpp)#pragma once
#include "MainWindow.g.h"
namespace winrt::WinuiDemo::implementation
{
struct MainWindow : MainWindowT<MainWindow>
{
private:
int32_t m_myPropValue = 0; // save the value of MyProperty
public:
MainWindow()
{
// Xaml objects should not call InitializeComponent during construction.
// See https://github.com/microsoft/cppwinrt/tree/master/nuget#initializecomponent
}
//getter & setter function
int32_t MyProperty();
void MyProperty(int32_t value);
//Click Function
void Button_Click(winrt::Windows::Foundation::IInspectable const& sender, winrt::Microsoft::UI::Xaml::RoutedEventArgs const& e);
};
}
namespace winrt::WinuiDemo::factory_implementation
{
struct MainWindow : MainWindowT<MainWindow, implementation::MainWindow>
{
};
}
Code language: C++ (cpp)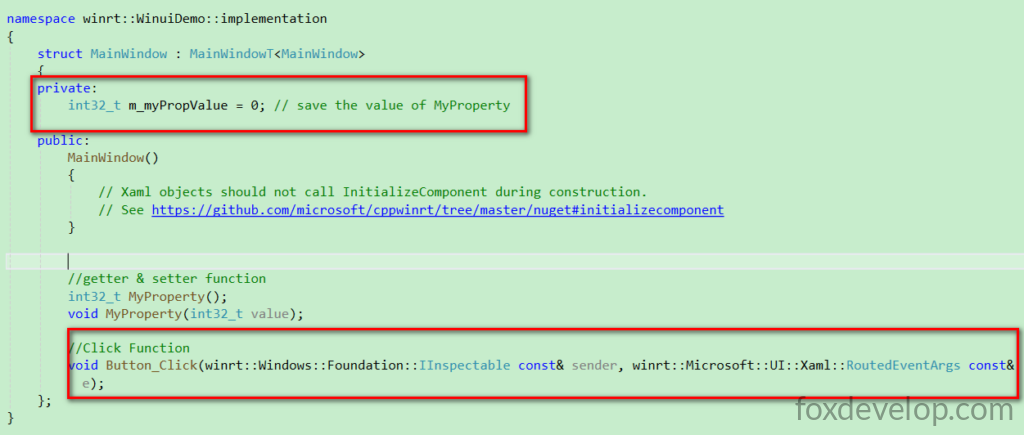
接著修改 .cpp 內的讀取與設定屬性函式;在點擊事件中先透過 MyProperty() 取得當前數值再加一,最重要的一點是:
this->Bindings->Update(); 這一行千萬不能省略,用途是通知所有綁定此屬性的 UI 控制項重新整理畫面;缺少這行程式畫面數值不會更新。
#include "pch.h"
#include "MainWindow.xaml.h"
#if __has_include("MainWindow.g.cpp")
#include "MainWindow.g.cpp"
#endif

using namespace winrt;
using namespace Microsoft::UI::Xaml;

// To learn more about WinUI, the WinUI project structure,
// and more about our project templates, see: http://aka.ms/winui-project-info.

namespace winrt::WinuiDemo::implementation
{
    int32_t MainWindow::MyProperty()
    {
        return m_myPropValue; //get m_myPropValue
    }

    void MainWindow::MyProperty(int32_t  value)
    {
        m_myPropValue = value; //set m_myPropValue
        this->Bindings->Update(); // Force refresh all x:Bind bindings on this page to update UI display
    }
}

void winrt::WinuiDemo::implementation::MainWindow::Button_Click(winrt::Windows::Foundation::IInspectable const& sender,
 winrt::Microsoft::UI::Xaml::RoutedEventArgs const& e)
{
    MyProperty(MyProperty() + 1);//update m_myPropValue, let it add 1
}
Code language: C++ (cpp)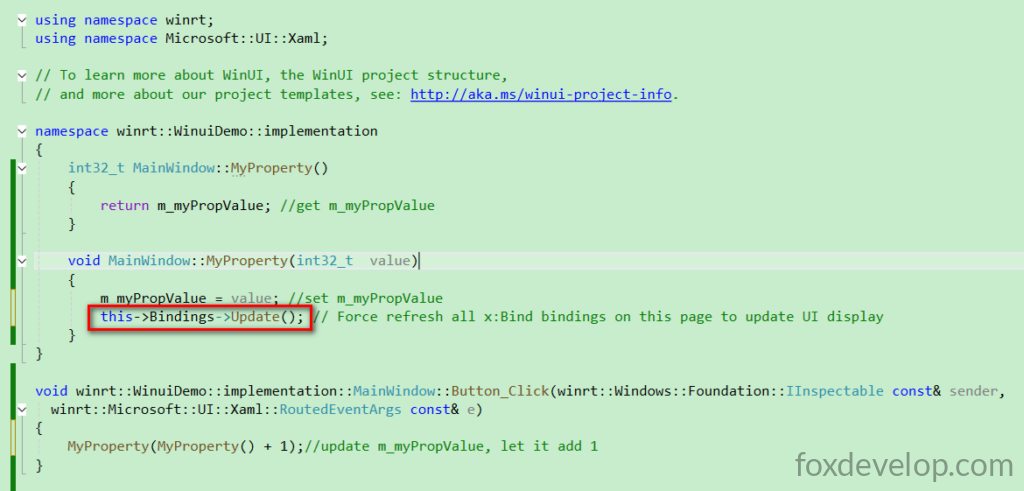
重新建置並執行專案
作者本機建置等待時間非常漫長,每台電腦耗時會有差異。
Build started at 15:29...
1>------ Build started: Project: WinuiDemo, Configuration: Debug x64 ------
1>WindowsAppSDKMLDeploymentMode=Framework
1>App.xaml.cpp
1>MainWindow.xaml.cpp
C++ 建置流程會產生大量中繼檔案,作者這台電腦當時跑了超過十分鐘都還沒完成。
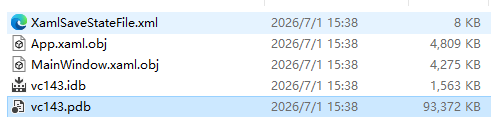
到本機時間 15:40 總算建置完成、彈出程式視窗,整整耗時 11 分鐘;過程中我一度以為程式卡死,差點關掉 Visual Studio。
最終執行效果
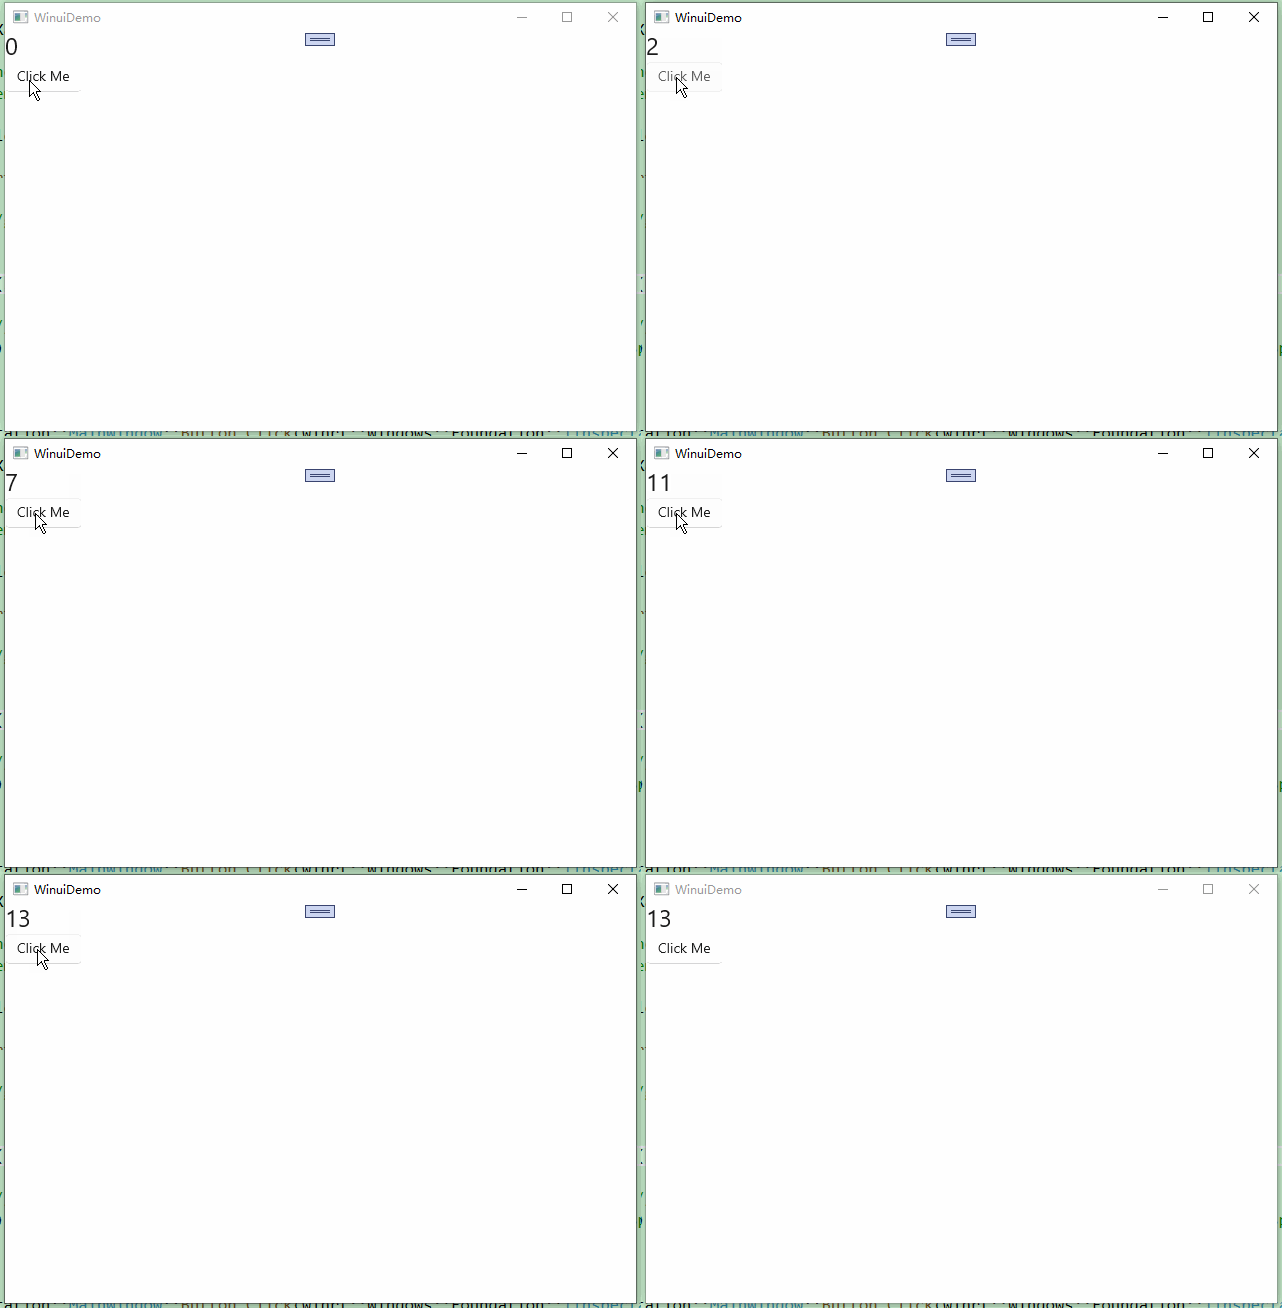
本課程到此結束。今天我們學會了兩個重點:一、點擊按鈕後執行後端邏輯並修改畫面內容;二、透過屬性綁定,修改後端數值時 UI 會自動同步更新。