In the last lesson, we finished setting up WinUI C++ and created our first working app. Today, we’ll break down every part of this starter WinUI C++ project step by step.
Let’s go over what each file and folder does in this project.
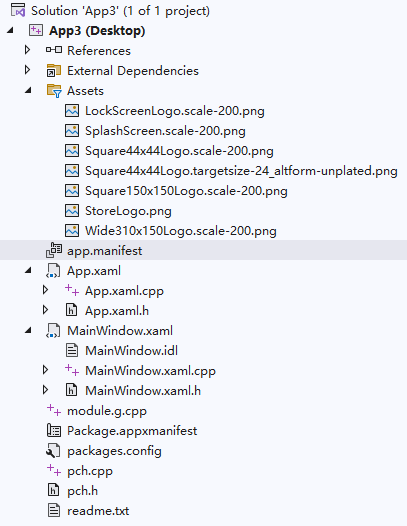
Breaking Down the Project Structure
What Is a Solution?
At the very top, you’ll see Solution ‘App3’ — this is our solution name, set to App3 by default. You can customize the solution name when creating a new project; it will automatically match your project name unless you change it manually.
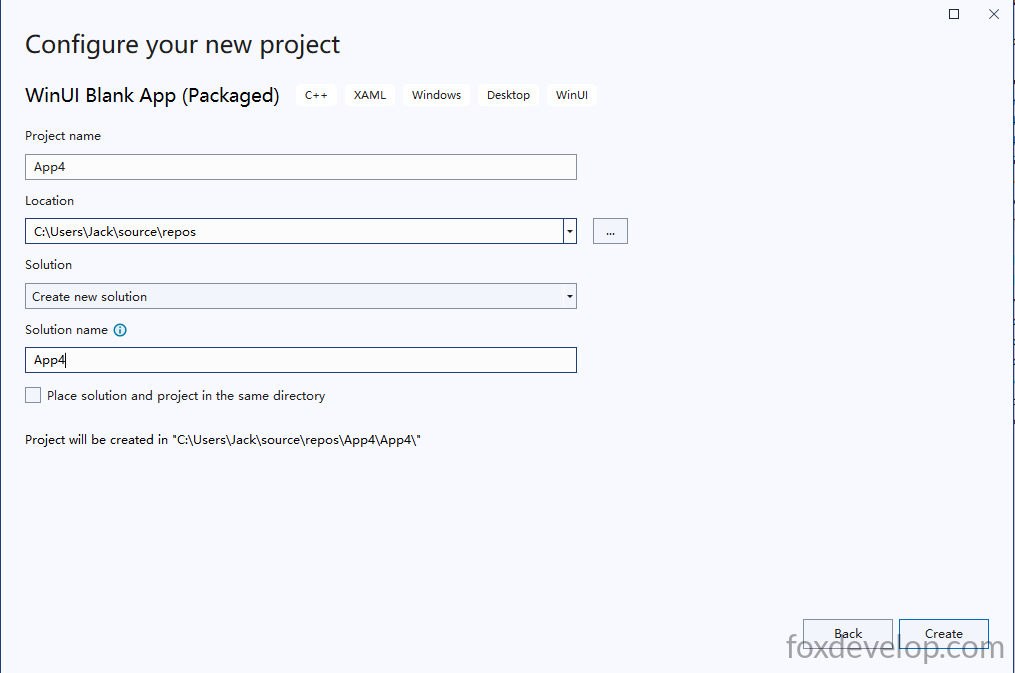
In the screenshot above, the first input box sets your project name, while the last one controls the solution name. They share the same value by default, but you can set them to different names if needed.
A single solution can hold multiple separate projects. Right now, we only have one packaged desktop project here: App3 (Desktop).
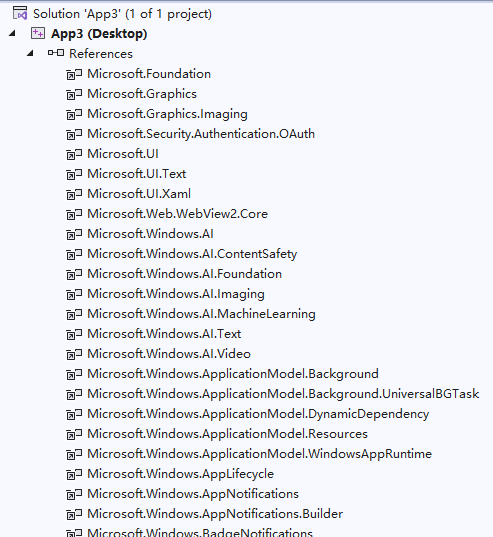
1. References
This section stores all project dependencies, including SDKs, the Windows App SDK, WinRT runtime libraries, and NuGet package references:
- All core dependencies live here: Windows SDK, WinUI 3 control library, C++/WinRT header files, Microsoft.UI.Xaml, and more;
- No manual edits required — Visual Studio automatically updates these entries when you manage NuGet packages.
2. External Dependencies
This folder auto-scans and displays system headers, SDK headers, and third-party library header files:
- Windows.h, all winrt/ prefixed headers, low-level Microsoft.UI.Xaml headers;
- This folder is read-only. You can only view external source code here, not edit it. These files come bundled with your Visual Studio installation.
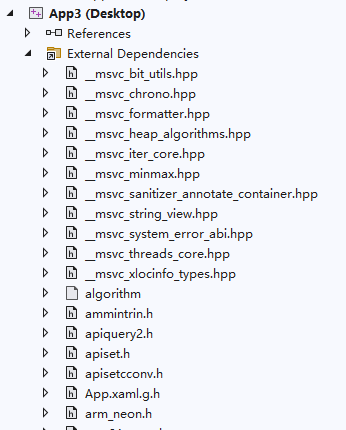
Double-click any file inside this folder to open it. Hover your mouse over the filename at the top of the editor window to reveal its full file path, which will point to your Visual Studio install directory.

3. Assets Folder (App Icons & Splash Screens)
This folder holds all image assets used by the Microsoft Store, system popups, startup splash screens, and lock screens, required for packaging and publishing your app to the Microsoft Store.
You might wonder why we have all these image files. When we created this project, we selected a packaged app template. A packaged app compiles into an MSIX file built for Microsoft Store distribution. What’s the difference between packaged and unpackaged apps? Unpackaged apps work as standalone portable software: you compile a raw EXE file and launch it directly by double-clicking it. Packaged apps bundle every EXE, DLL, and resource file into a single installer package. Users double-click this package file to install your application. Since our end goal is publishing to the Microsoft Store, we chose the packaged template.
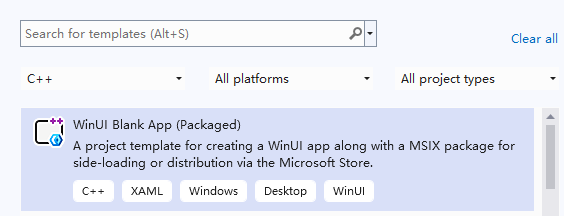
The screenshot above shows the project template we selected during creation. Its description states this template builds MSIX packages ready for Microsoft Store submission. Store listings require dozens of icons and branded graphics, which is why this folder comes pre-populated with asset files. You can also build unpackaged EXE apps without these assets, which we’ll cover in a later lesson.
Purpose of Each Asset Image
| File Name | Use Case |
|---|---|
| LockScreenLogo.scale-200.png | App icon shown on the Windows lock screen (200% high DPI scaling) |
| SplashScreen.scale-200.png | Loading splash screen displayed when launching the app |
| Square44x44Logo… (multiple variants) | Small Start Menu icons, taskbar icons, Alt+Tab window previews |
| Square150x150Logo.scale-200.png | Medium-sized tile icon in the Windows Start Menu |
| StoreLogo.png | Primary large app banner displayed on the Microsoft Store listing |
| Wide310x150Logo.scale-200.png | Wide horizontal tile layout for the Windows Start Menu |
app.manifest
Legacy Windows application manifest (Win32 compatible):
- Defines app permissions, supported Windows OS versions, DPI awareness, admin execution rights, and window scaling behavior;
- Distinct from the UWP-style
Package.appxmanifest— packaged desktop projects use both manifest files side-by-side.
4. App.xaml / App.xaml.h / App.xaml.cpp
Global root application class (maps to winrt::App3::App)
App.xaml: Global XAML resource dictionary containing shared styles, control templates, color palettes, fonts, and theme resources accessible across every page in the entire project.App.xaml.h: Auto-generated C++/WinRT header file that declares the App class, including core lifecycle methods such as OnLaunched and OnActivated.App.xaml.cpp: Implements all application lifecycle logic:OnLaunched: Triggers when the app starts; initializes and renders theMainWindow;- Handles window activation, suspension, theme switching, and runtime exception catching;
- All global initialization logic (font setup, database connections, singleton service initialization) belongs here.
Open the CPP file, and you’ll see this core function:
    void App::OnLaunched([[maybe_unused]] LaunchActivatedEventArgs const& e)
    {
        window = make<mainwindow>();
        window.Activate();
    }</mainwindow>Code language: C++ (cpp)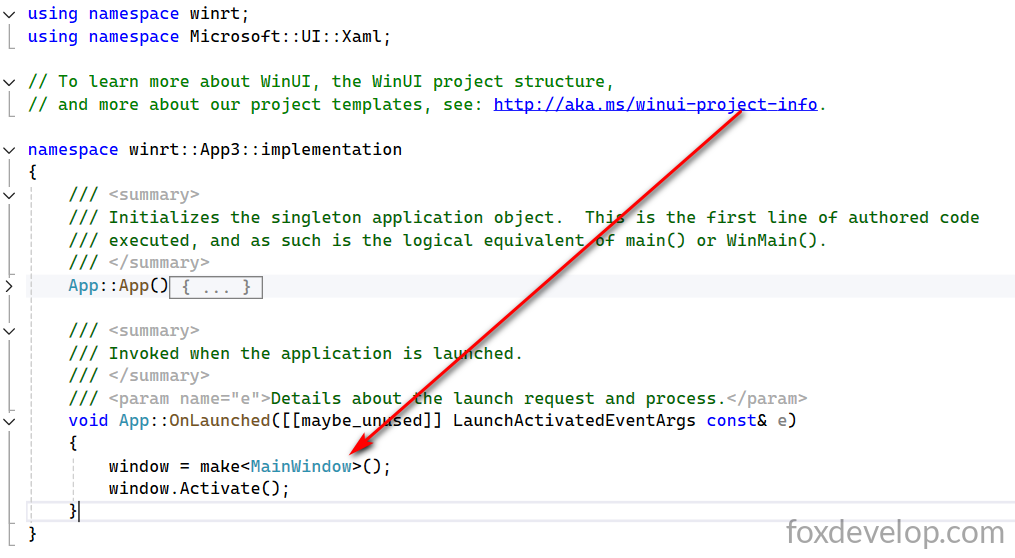
This function hands control over to MainWindow. The App class acts only as the app entry point — it does not render visible windows. MainWindow is where all visible windows, UI controls, and dialogs are actually created.
5. Full MainWindow.xaml Set (Primary App Window)
This is the default root visual window for your desktop application, the top-level container for all UI content.
MainWindow.xaml: Defines window layout and all UI elements including buttons, text inputs, navigation controls, and page host Frames;MainWindow.idl: Core C++/WinRT IDL interface definition file — declares all exposed window properties, methods, and events for XAML data binding, cross-component function calls, and type metadata generation. Modifying this file auto-generates glue .h/.cpp code.MainWindow.xaml.h: Auto-generated header file built from IDL + XAML definitions, storing UI control member variables, class constructors, and event handler prototypes.MainWindow.xaml.cpp: Implements window business logic: button click handlers, data binding, page navigation, and all interactive control code.
The MainWindow.xaml file below is where you design your UI layout and place all visual controls:
<?xml version="1.0" encoding="utf-8"?>
<Window
    x:Class="App3.MainWindow"
    xmlns="http://schemas.microsoft.com/winfx/2006/xaml/presentation"
    xmlns:x="http://schemas.microsoft.com/winfx/2006/xaml"
    xmlns:local="using:App3"
    xmlns:d="http://schemas.microsoft.com/expression/blend/2008"
    xmlns:mc="http://schemas.openxmlformats.org/markup-compatibility/2006"
    mc:Ignorable="d"
    Title="App3">

    <Grid>

    </Grid>
</Window>
Code language: HTML, XML (xml)
6. module.g.cpp
Auto-generated global C++/WinRT module file — never edit manually
- Generates WinRT type registration code based on every
.idlfile in your project; - Exposes the
winrt::App3::implementationnamespace entry point, letting the Windows runtime recognize your custom XAML controls and window classes; - Visual Studio automatically regenerates this file whenever you add or remove IDL files.
7. Package.appxmanifest (MSIX Packaging Manifest — Critical File)
This configuration file packages your desktop app into an MSIX/MSIX installer package; double-click it to open a visual configuration editor:
- Sets app display name, version number, publisher identity, icons, and default startup entry point;
- Declares all system permissions your app requires (file system access, camera, network connectivity, background tasks);
- Configures file association protocols, URL link handlers, and custom app extensions;
- Manages Microsoft Store listing metadata, desktop shortcuts, and file type mappings. To distinguish it from app.manifest: this file is the Microsoft Store / MSIX package manifest, exclusive to UWP and packaged desktop applications.
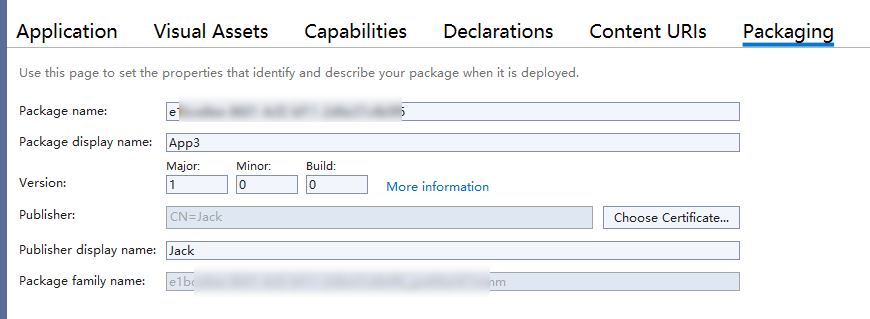
Here you configure all store-related values including app version, package name, and publisher ID — you retrieve these credentials directly from your Microsoft Store developer dashboard.
8. packages.config
NuGet package manifest file that tracks exact versions of all NuGet packages installed in your project, such as:
- Microsoft.Windows.SDK.NET, Windows App SDK, C++/WinRT, and WinUI 3 libraries;
- When collaborating with a team or switching workstations, Visual Studio uses this file to restore all required dependency packages automatically.
9. pch.h/pch.cpp (Precompiled Headers, Accelerates C++ Build Times)
pch stands for Precompiled Header
pch.h: Central import file for all shared global headers (winrt/Windows.*, Microsoft.UI.Xaml.*, standard C++ libraries). Every CPP file in the project starts with#include "pch.h";pch.cpp: Source file used to compile the precompiled header. The core benefit: drastically cuts build time by avoiding repeated reimports of dozens of system headers in every single code file.
All common library references are consolidated into this single header file. Other source files only need to include this one file to access all dependencies, reducing redundant code and speeding up compilation.
10. readme.txt
Documentation template included with Visual Studio’s WinUI 3 C++ project template, covering basic build, packaging, and debugging workflows for WinUI C++ projects.
Two Easy-to-Mix-Up Manifest Files
app.manifest→ Legacy Win32 process manifest (window behavior, OS compatibility, runtime permissions)Package.appxmanifest→ MSIX application package manifest (Store publishing, installer settings, system capability declarations)
Full App Runtime Workflow
- App launches → Execution enters
App::OnLaunched(App.xaml.cpp) - Instantiate and activate the MainWindow: window = make
(); window.Activate(); MainWindow.xamlrenders the UI layout, while the matching CPP file handles all user interactions- During packaging for release, the build pipeline reads
Package.appxmanifestto generate the installer package, embedding all icon assets stored inside the Assets folder
That covers the complete folder structure and runtime execution flow of our blank starter WinUI C++ project. In our next lesson, we’ll add a clickable button to the window and implement logic to increment a counter on the button’s label, helping you fully grasp how the WinUI C++ framework executes UI and backend logic.