Developers with prior WPF experience will be familiar with the Grid control; its behavior in WinUI is largely identical to WPF. In this lesson, we will create a 3×3 numeric keypad using Grid layout. All buttons share the same click event handler. When a button is clicked, we retrieve its Tag value and print the Tag string to the debug console for debugging demonstration. In real-world projects, you can use the button’s Tag property to identify which button was pressed and execute corresponding business logic.
Final preview effect
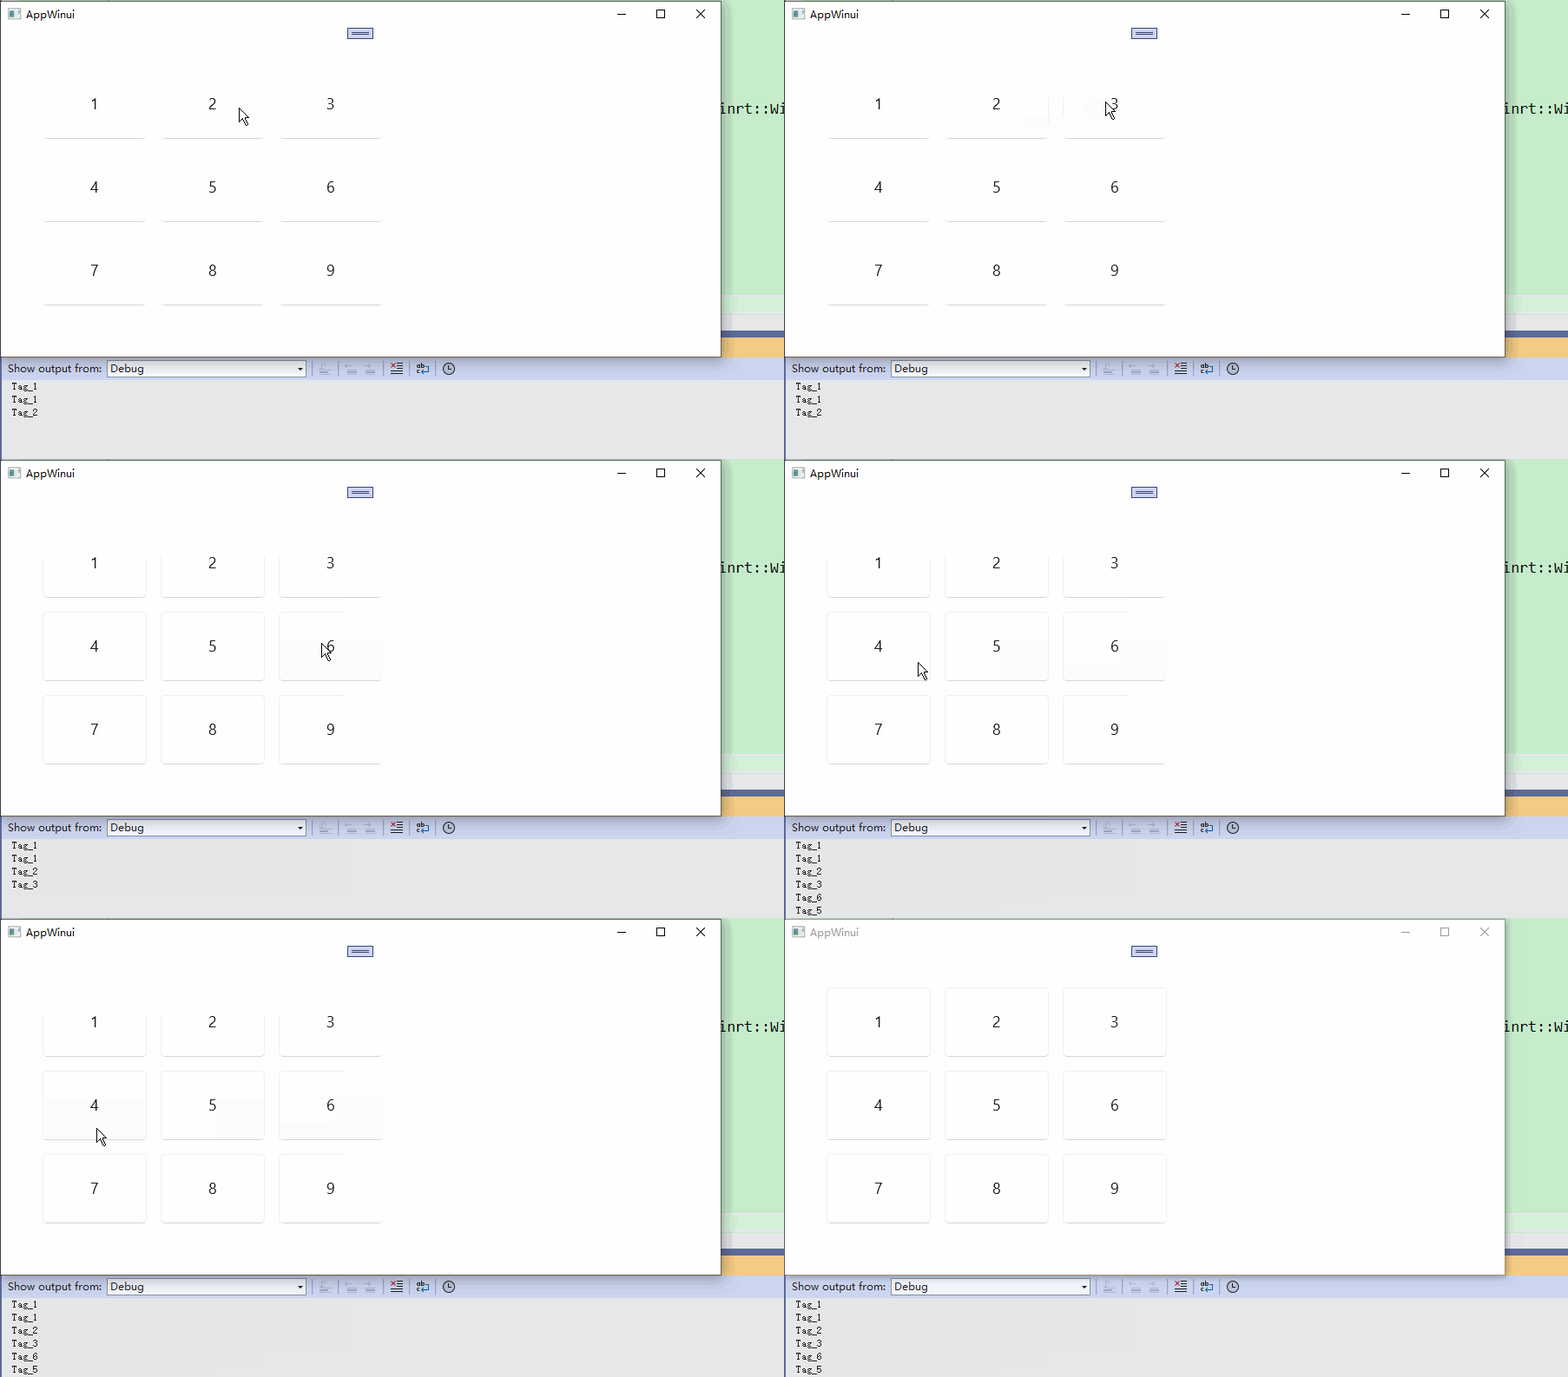
Create a new WinUI project and replace the root Grid with the following XAML code:
<Grid Padding="40">
    <!-- 3 Rows, 3 Columns 3x3 Grid Layout -->
    <Grid.RowDefinitions>
        <RowDefinition Height="Auto"/>
        <RowDefinition Height="Auto"/>
        <RowDefinition Height="Auto"/>
    </Grid.RowDefinitions>
    <Grid.ColumnDefinitions>
        <ColumnDefinition Width="Auto"/>
        <ColumnDefinition Width="Auto"/>
        <ColumnDefinition Width="Auto"/>
    </Grid.ColumnDefinitions>

    <!-- Row 1 -->
    <Button Grid.Row="0" Grid.Column="0" Content="1" Tag="Tag_1" Click="OnGridButtonClick" Width="120" Height="80" Margin="8" FontSize="18"/>
    <Button Grid.Row="0" Grid.Column="1" Content="2" Tag="Tag_2" Click="OnGridButtonClick" Width="120" Height="80" Margin="8" FontSize="18"/>
    <Button Grid.Row="0" Grid.Column="2" Content="3" Tag="Tag_3" Click="OnGridButtonClick" Width="120" Height="80" Margin="8" FontSize="18"/>

    <!-- Row 2 -->
    <Button Grid.Row="1" Grid.Column="0" Content="4" Tag="Tag_4" Click="OnGridButtonClick" Width="120" Height="80" Margin="8" FontSize="18"/>
    <Button Grid.Row="1" Grid.Column="1" Content="5" Tag="Tag_5" Click="OnGridButtonClick" Width="120" Height="80" Margin="8" FontSize="18"/>
    <Button Grid.Row="1" Grid.Column="2" Content="6" Tag="Tag_6" Click="OnGridButtonClick" Width="120" Height="80" Margin="8" FontSize="18"/>

    <!-- Row 3 -->
    <Button Grid.Row="2" Grid.Column="0" Content="7" Tag="Tag_7" Click="OnGridButtonClick" Width="120" Height="80" Margin="8" FontSize="18"/>
    <Button Grid.Row="2" Grid.Column="1" Content="8" Tag="Tag_8" Click="OnGridButtonClick" Width="120" Height="80" Margin="8" FontSize="18"/>
    <Button Grid.Row="2" Grid.Column="2" Content="9" Tag="Tag_9" Click="OnGridButtonClick" Width="120" Height="80" Margin="8" FontSize="18"/>
</Grid>Code language: HTML, XML (xml)
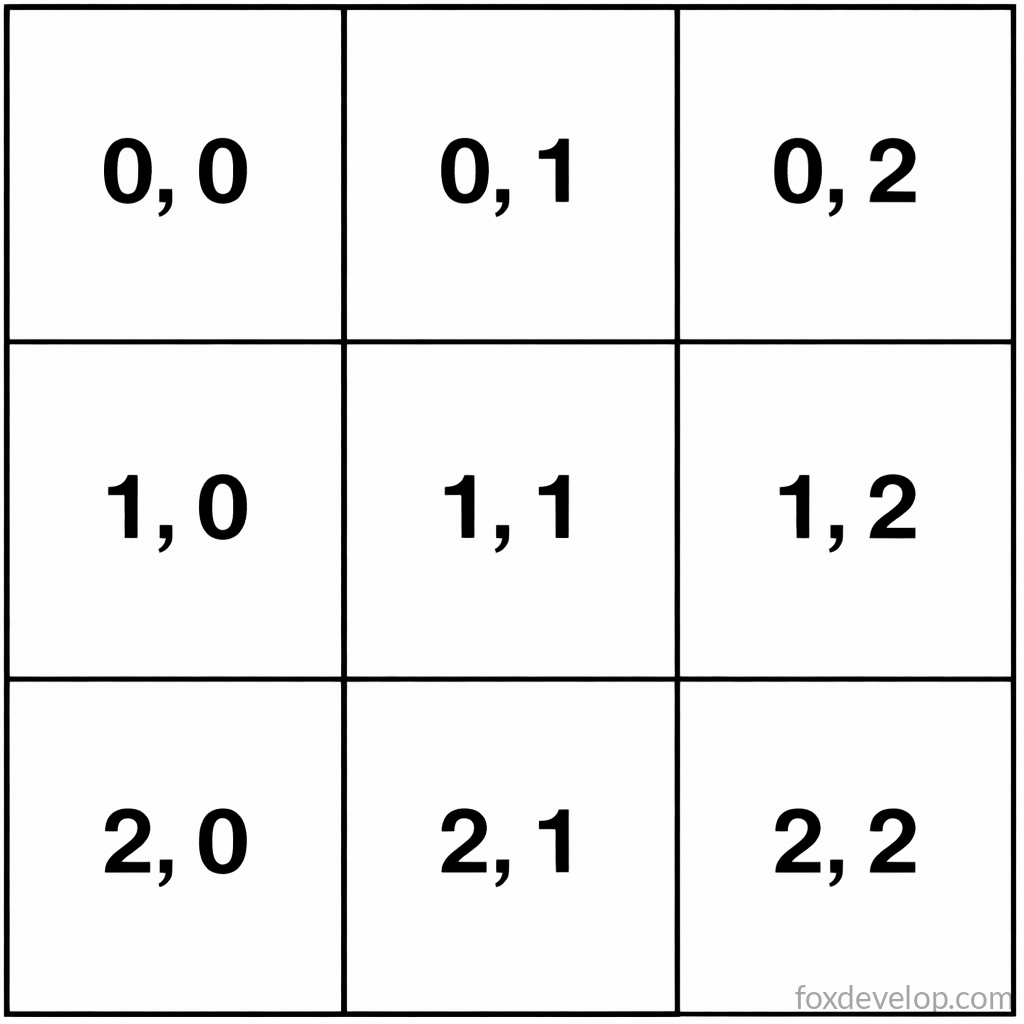
The Grid is a core layout panel. You define rows and columns via RowDefinitions and ColumnDefinitions. Child elements use the Grid.Row and Grid.Column attached properties to specify their cell position. This sample creates a 3×3 grid. The top-left cell uses index 0 for both row and column (indices start at 0, not 1), and the bottom-right cell is located at Row=2, Column=2.
All buttons bind to the identical click handler via Click="OnGridButtonClick". Press F12 on the event name in XAML to auto-generate the event stub.
In the generated C++ event handler, cast the sender argument to a Button to access its Tag property, which identifies the clicked button.
    Button targetButton = sender.as<Button>();
    if (!targetButton) return;

    // Get custom tag string
    hstring buttonTag = unbox_value<hstring>(targetButton.Tag());

    OutputDebugStringW(buttonTag.c_str());
    OutputDebugStringW(L"\n");
Code language: C++ (cpp)
Add the required namespace includes at the top of the .cpp file to resolve control types. Full complete code below:
#include "pch.h"
#include "MainWindow.xaml.h"
#if __has_include("MainWindow.g.cpp")
#include "MainWindow.g.cpp"
#endif

#include <winrt/Microsoft.UI.Xaml.Controls.h>
#include <winrt/Microsoft.UI.Xaml.h>

using namespace winrt;
using namespace Microsoft::UI::Xaml;
using namespace Microsoft::UI::Xaml::Controls;
using namespace Windows::Foundation;

// To learn more about WinUI, the WinUI project structure,
// and more about our project templates, see: http://aka.ms/winui-project-info.

namespace winrt::AppWinui::implementation
{
    int32_t MainWindow::MyProperty()
    {
        throw hresult_not_implemented();
    }

    void MainWindow::MyProperty(int32_t /* value */)
    {
        throw hresult_not_implemented();
    }
}

void winrt::AppWinui::implementation::MainWindow::OnGridButtonClick(
winrt::Windows::Foundation::IInspectable const& sender, winrt::Microsoft::UI::Xaml::RoutedEventArgs const& e)
{
    Button targetButton = sender.as<Button>();
    if (!targetButton) return;

    // Get custom tag string
    hstring buttonTag = unbox_value<hstring>(targetButton.Tag());

    OutputDebugStringW(buttonTag.c_str());
	OutputDebugStringW(L"\n");
}
Code language: C++ (cpp)
OutputDebugStringW is a built-in Windows API function to print text to the Visual Studio debug output window. You can use it to log runtime information for debugging purposes.