Next up, we’ll walk through creating a C# console application using nothing more than the basic Notepad text editor.
In this lesson, we’ll start by writing our introductory program manually with the .NET CLI command-line tool before moving on to development inside an IDE. Visual Studio is Microsoft’s dedicated integrated development environment (IDE) built specifically for Windows C# development, packing a built-in code editor, real-time syntax checking, full project management and all related tools. We’ll cover its usage later on.
Console application: A program that runs inside a command-line window without any graphical GUI interface.
A console app is that plain black command prompt window with no graphical interface; you run it by typing commands directly.
You can pull up the console by searching for CMD in your Start Menu.
Console programs were widely used back in the DOS era. GUI software features visual window interfaces, yet both GUI and console apps operate on nearly identical underlying code logic.
Creating a Project
Create Project Folder
Open CMD, use the cd command to navigate to your target code folder, then create a new folder named HelloWorld
C:\csdemo>mkdir HelloWorld

C:\csdemo>cd HelloWorld

C:\csdemo\HelloWorld>
csdemo is a folder on the C drive reserved for storing all C# projects. You’re free to pick any storage directory you like; there’s no need to copy the exact path I use here.
The mkdir HelloWorld command above creates the HelloWorld folder, after which we switch our working directory into it.
This results in the full project directory path: C:\csdemo\HelloWorld
Create Source Code File
Now we’ll make our .cs source file from scratch
Open Notepad and create a new code file called Program.cs (.cs is the fixed file extension for all C# source files). Simply create a blank text file then rename its suffix to Program.cs
Tutorial sourced from foxdevelop.com

Open the file you just made with Notepad, then paste the following code inside:
System.Console.WriteLine("Hello Wellcome to FoxDevelop.com!");Code language: C# (cs)ConsoleClass: Class responsible for outputting text to the console window,WriteLine()is an output methodSystem: Core built-in namespace holding all fundamental utility classes
System.Console.WriteLine follows the format Namespace.ClassName.MethodName, a concept we’ll dive deeper into later. For now, just understand that this line prints the text Hello Wellcome to FoxDevelop.com! onto the console screen. All text content must be wrapped in standard English double quotation marks.
Create Project Configuration File
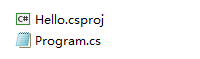
Make a new project configuration file named Hello.csproj (.csproj is the file extension for C# project files)
<Project Sdk="Microsoft.NET.Sdk">
  <PropertyGroup>
    <OutputType>Exe</OutputType> <!-- Compile into executable EXE file -->
    <TargetFramework>net8.0</TargetFramework> <!-- Runs on .NET 8 runtime -->
  </PropertyGroup>
</Project>Code language: HTML, XML (xml)
This config file tells the .NET CLI how to compile your project; you can also adjust settings here to output DLL library files instead of executables.
Keep in mind .NET 8.0 is the successor to .NET Core, Microsoft has rebranded the framework—older versions carried the Core suffix, while modern releases are simply labeled .NET.
If .NET 8.0 hasn’t been installed on your machine yet, you’ll need to set it up first to run the program.
Download the installer from this official page: Download .NET 8.0 (Linux, macOS, and Windows) | .NET
Select the installer matching your operating system. I’m running 64-bit Windows 10 so I picked the corresponding build shown below.
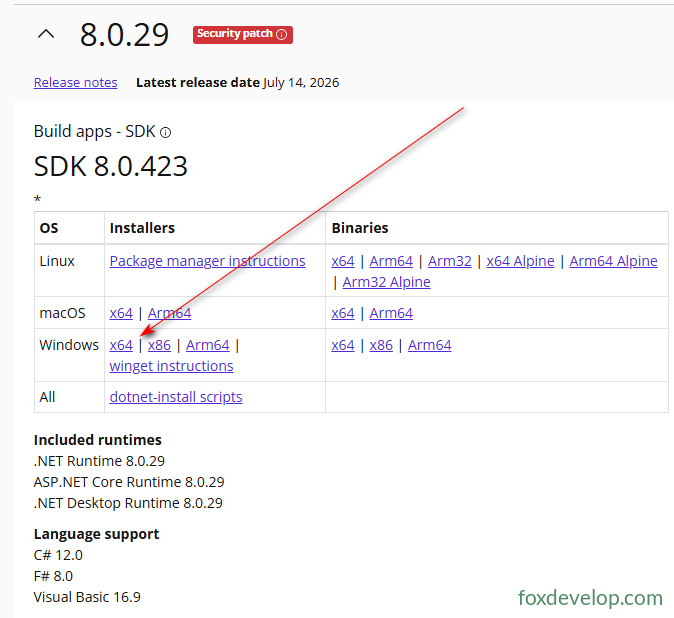
At the time of writing this guide, .NET 10 is the latest stable release. If you want to use the newest version, simply replace net8.0 inside the config file with your target framework version number.
About .NET Variants
There’s also the legacy .NET Framework branch, which only works on Windows systems. Its latest release is .NET Framework 4.8. Microsoft maintains two separate development tracks simultaneously.
Check out the previous chapter for a full breakdown of all .NET version differences.
Compile & Run the Program
Navigate your CMD session to the project root folder (where Hello.csproj resides), run the dotnet run command to compile and launch the program, which will output the text Hello Wellcome to FoxDevelop.com! ;

C:\csdemo\HelloWorld>dotnet run
Hello Wellcome to FoxDevelop.com!Code language: CSS (css)
Your very first C# sample program